Showing posts with label Stencils. Show all posts

Friday, August 26, 2022

Bad Mood Mixed Media Page

 Hello Friends!

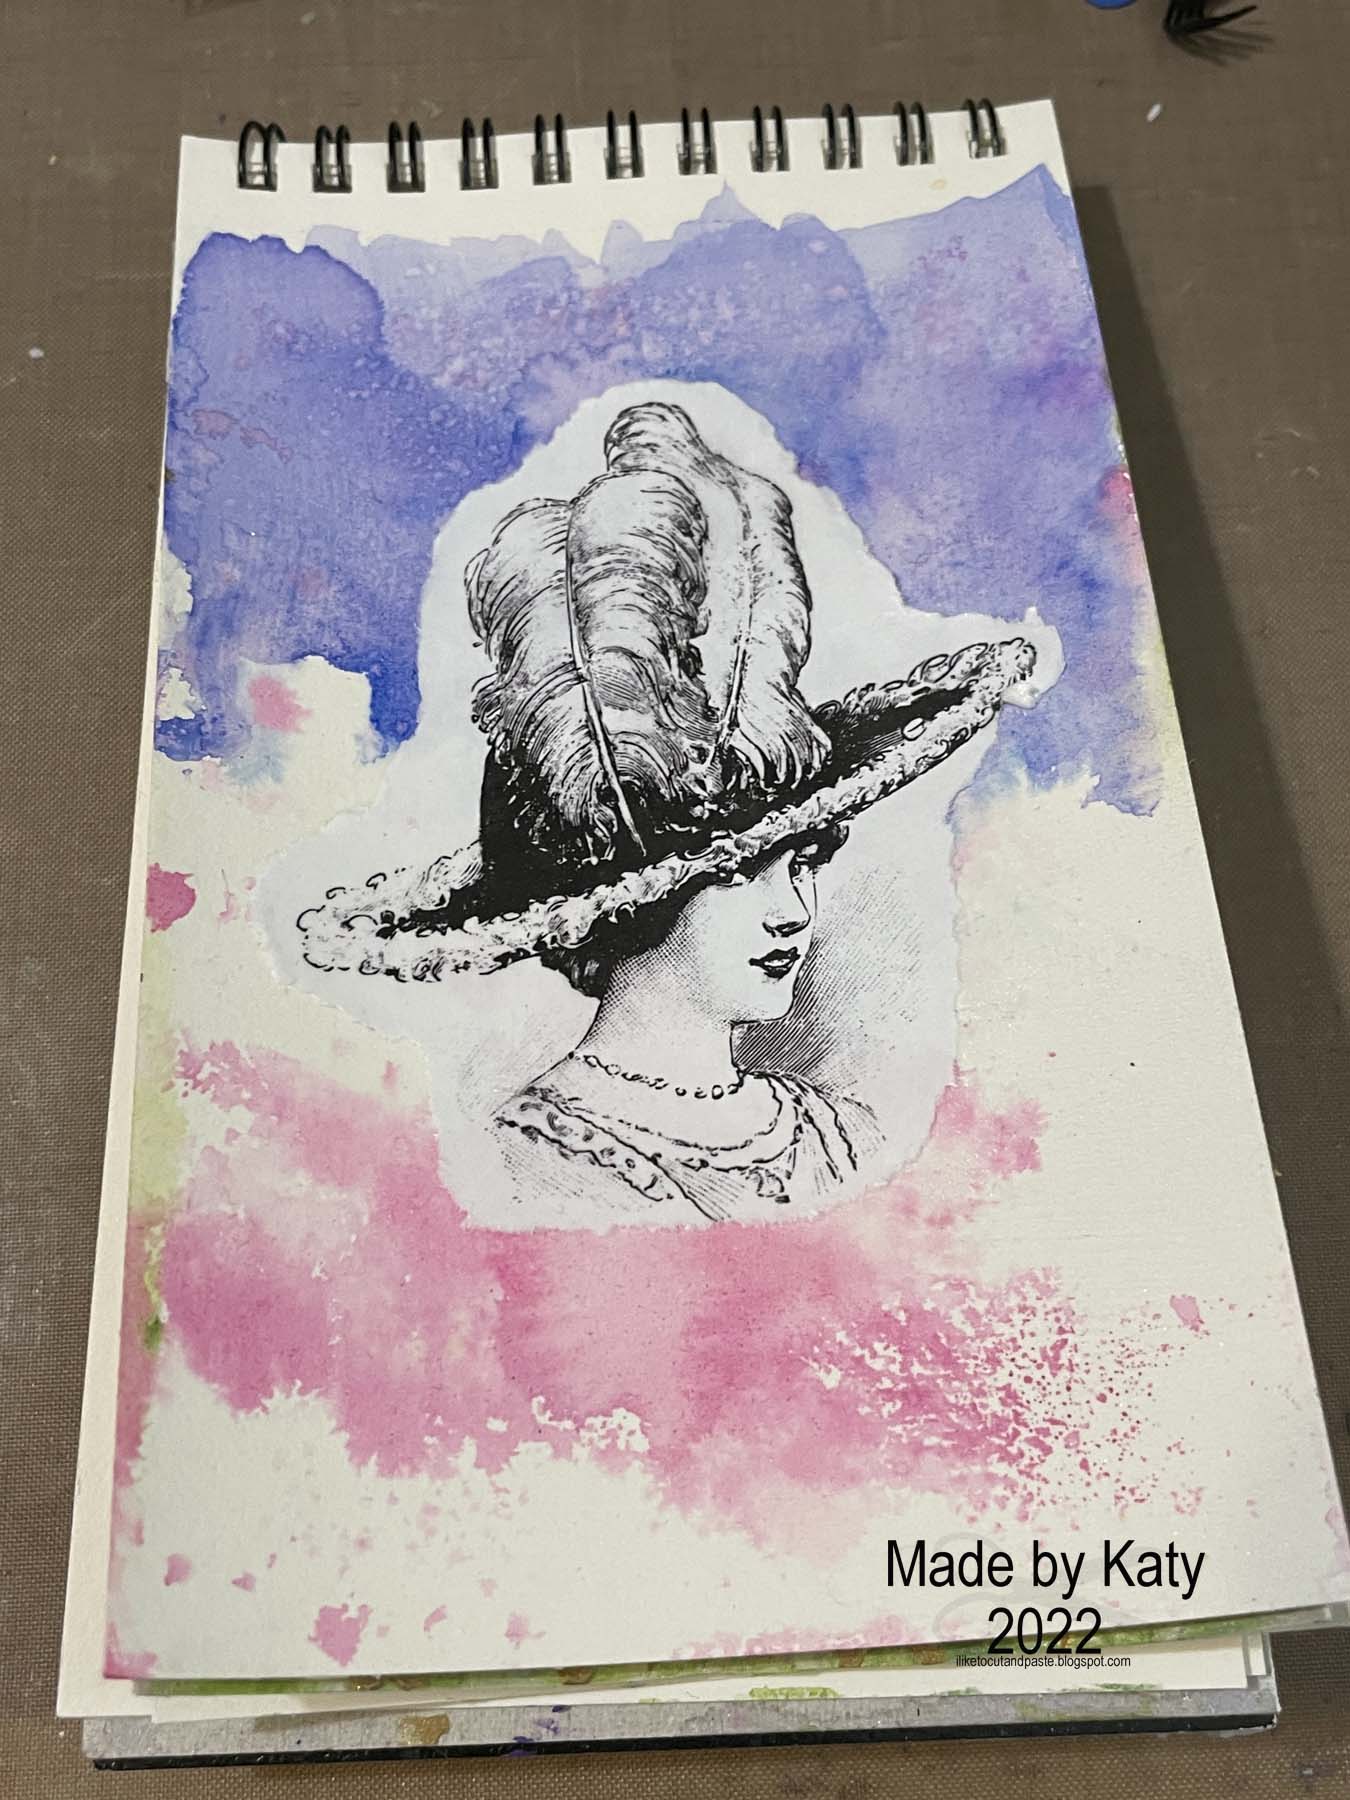
Do you have a long list of things you should be making-birthday cards, halloween things, maybe some tags? Me too! But I couldn't focus on that. I just wanted to play-so I created this page in my little art journal book. It's 4x6 so it's enough "real estate" :)  

When I chose this page the purple and and pink ink were already on there. I think I was using up something LOL.  The lady I printed off from my silhouette software and bought from the Silhouette design store-clickchic is the designer. She is just printed on regular copy paper. I used a paint brush and water to tear the paper around her. I adhered her with tim holtz collage medium and added more on top.


And then I played! I used mica hocus pocus and winterberry distress crayons for the feathers. For the edge of her hat I used hickory smoked crayon and antique linen crayon for her skin. I used a little left over hocus pocus for her dress.

Then I used distress ink villianous potion and my simon says stamp heart stencil and added hearts. I used a script tim holtz stamp and faded jeans distress ink and added some stamping. And the sentiment is where the bad mood comes from LOL.


Here's a close up. I think I can relate ;) LOL. 


This week at Simon Says Stamp Monday Challenge is Mixed Media--I am submitting this art journal page. 

Thank you for stopping by! :)


Sunday, August 14, 2022

USA Scrapbook Layout

 Hello Friends!

I love the 1 page sketch over at Stick It Down this month. I really love stars right now-so here's my layout:


I used a stencil from Paige Evans and I used candied apple and blueprint sketch oxide first through the stencil and then I put stickles on top of it. I used a border punch from stampin up and used some scraps for the bottom. And I love the heart washi tape and thought why not? Stars and hearts it is :)


I cut these letters on my silhouette cameo. I tried with just the stickles but I didn't like it so I applied the oxides and then went over it with the stickles.


Here's a close up of the title and some of the stars.

Here is the Stick It Down sketch:


Thank you for stopping by! :)


Monday, July 11, 2022

Smile Canvas

 Hello Friends!

I am playing along with the challenge at The Funkie and Frilly Boutique Blog today. The challenge is called Stencil Mania and you are to use 3 stencils on a project. Funny story-I made a card (the post previous to this) using a stencil and a fun technique. I was all happy until I went back to make sure I had everything right-to find out that you need to use 3 stencils and not 1. LOLOL. So here is my project :) (And I'm glad I double checked!)


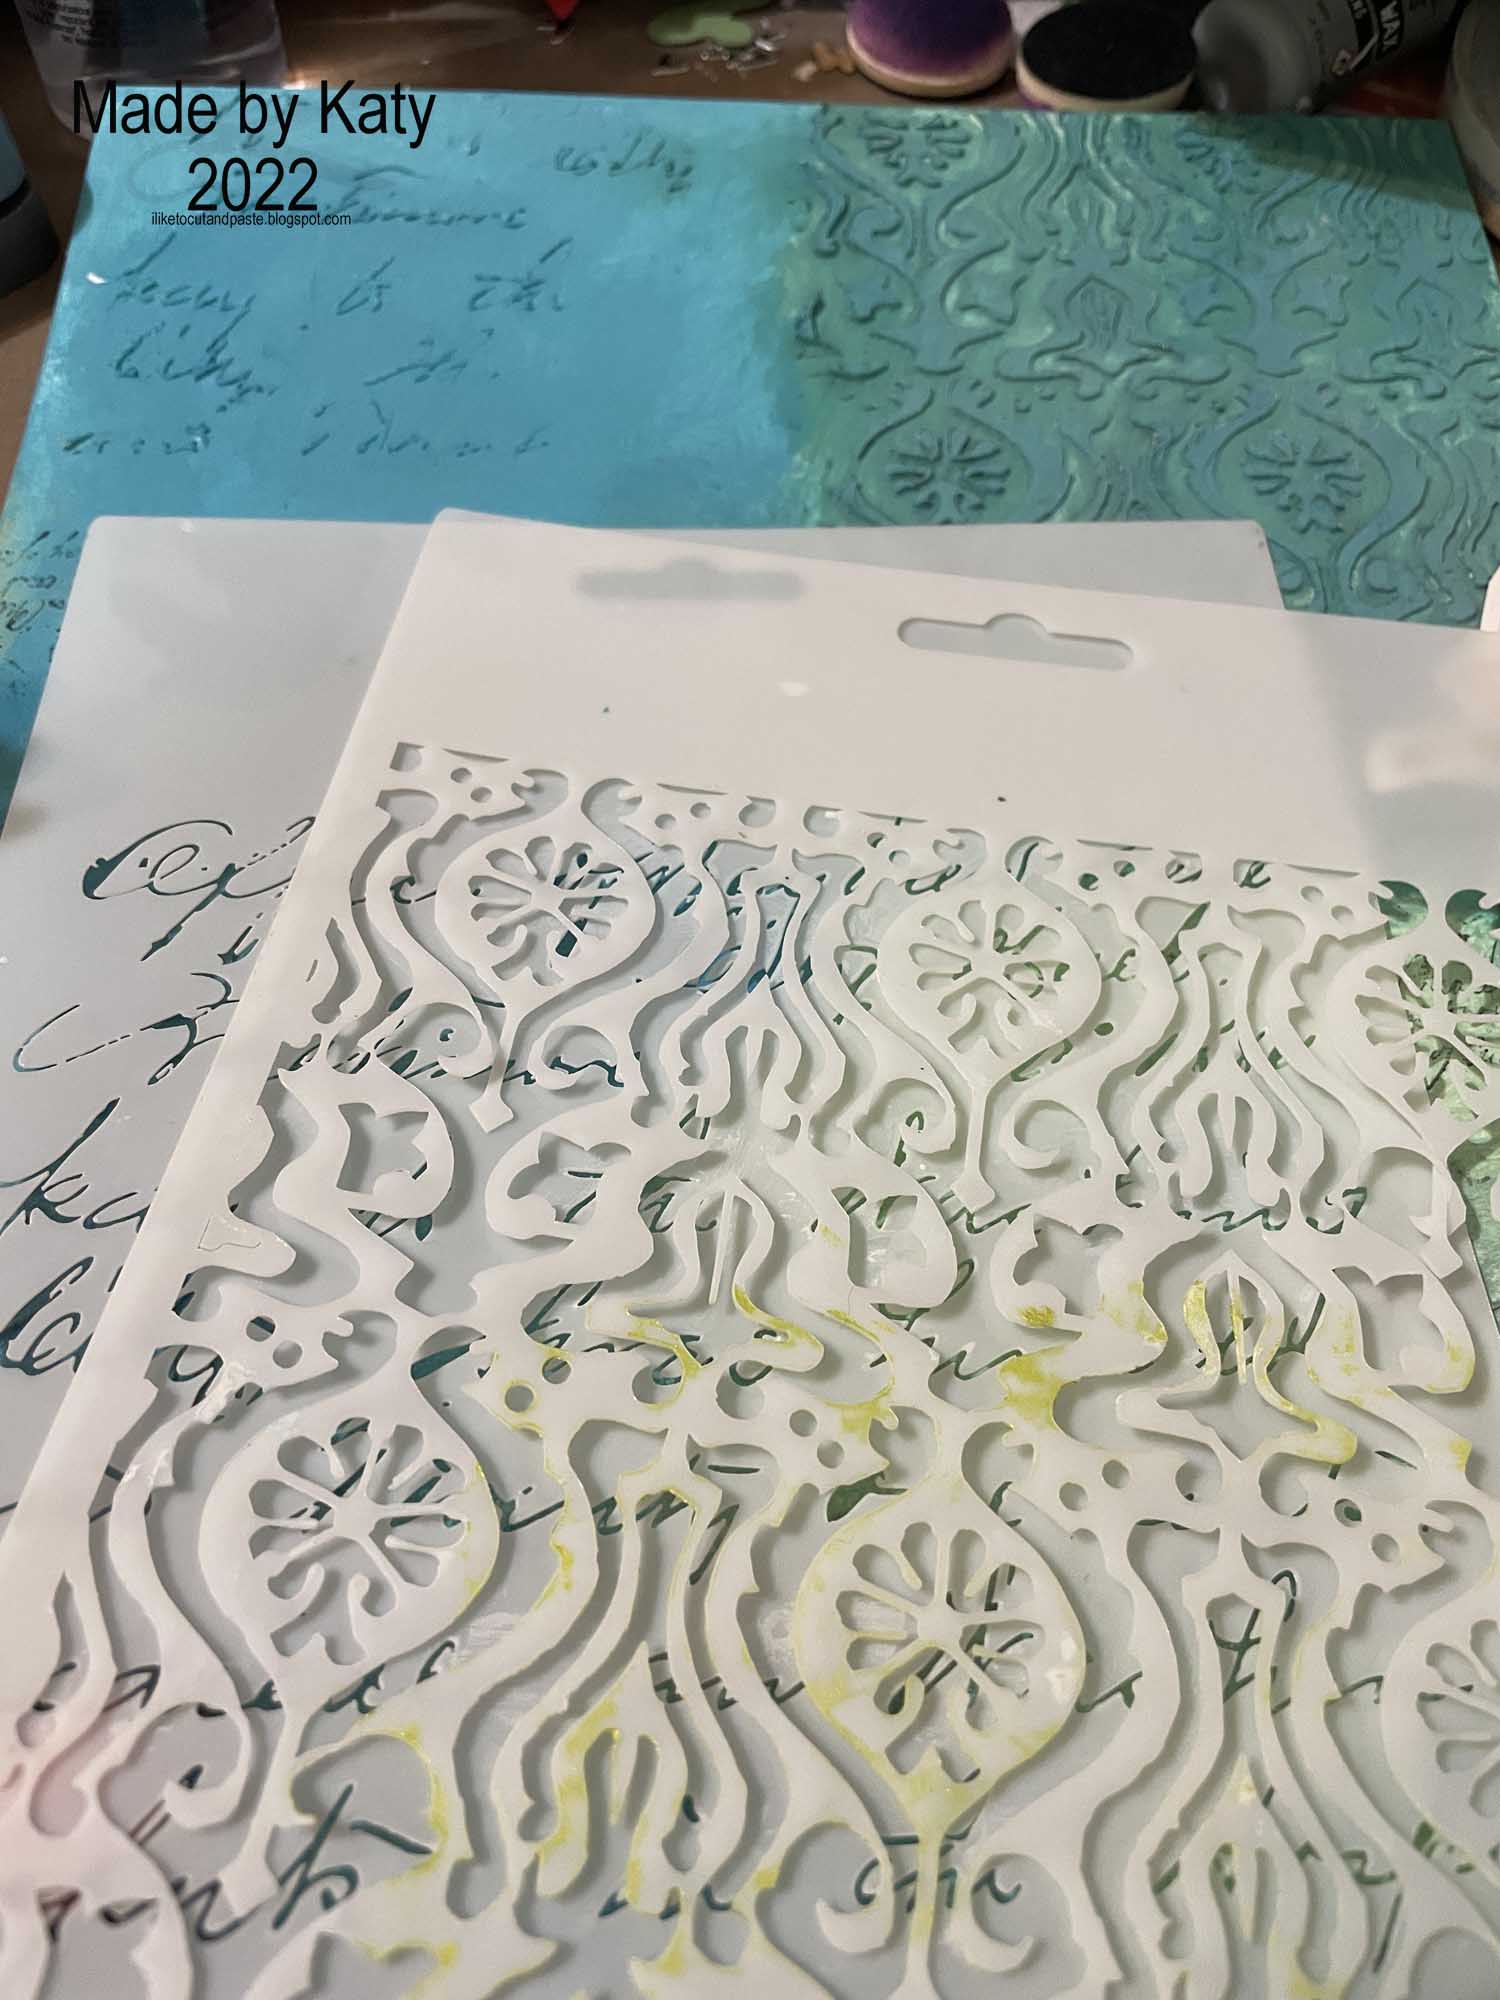
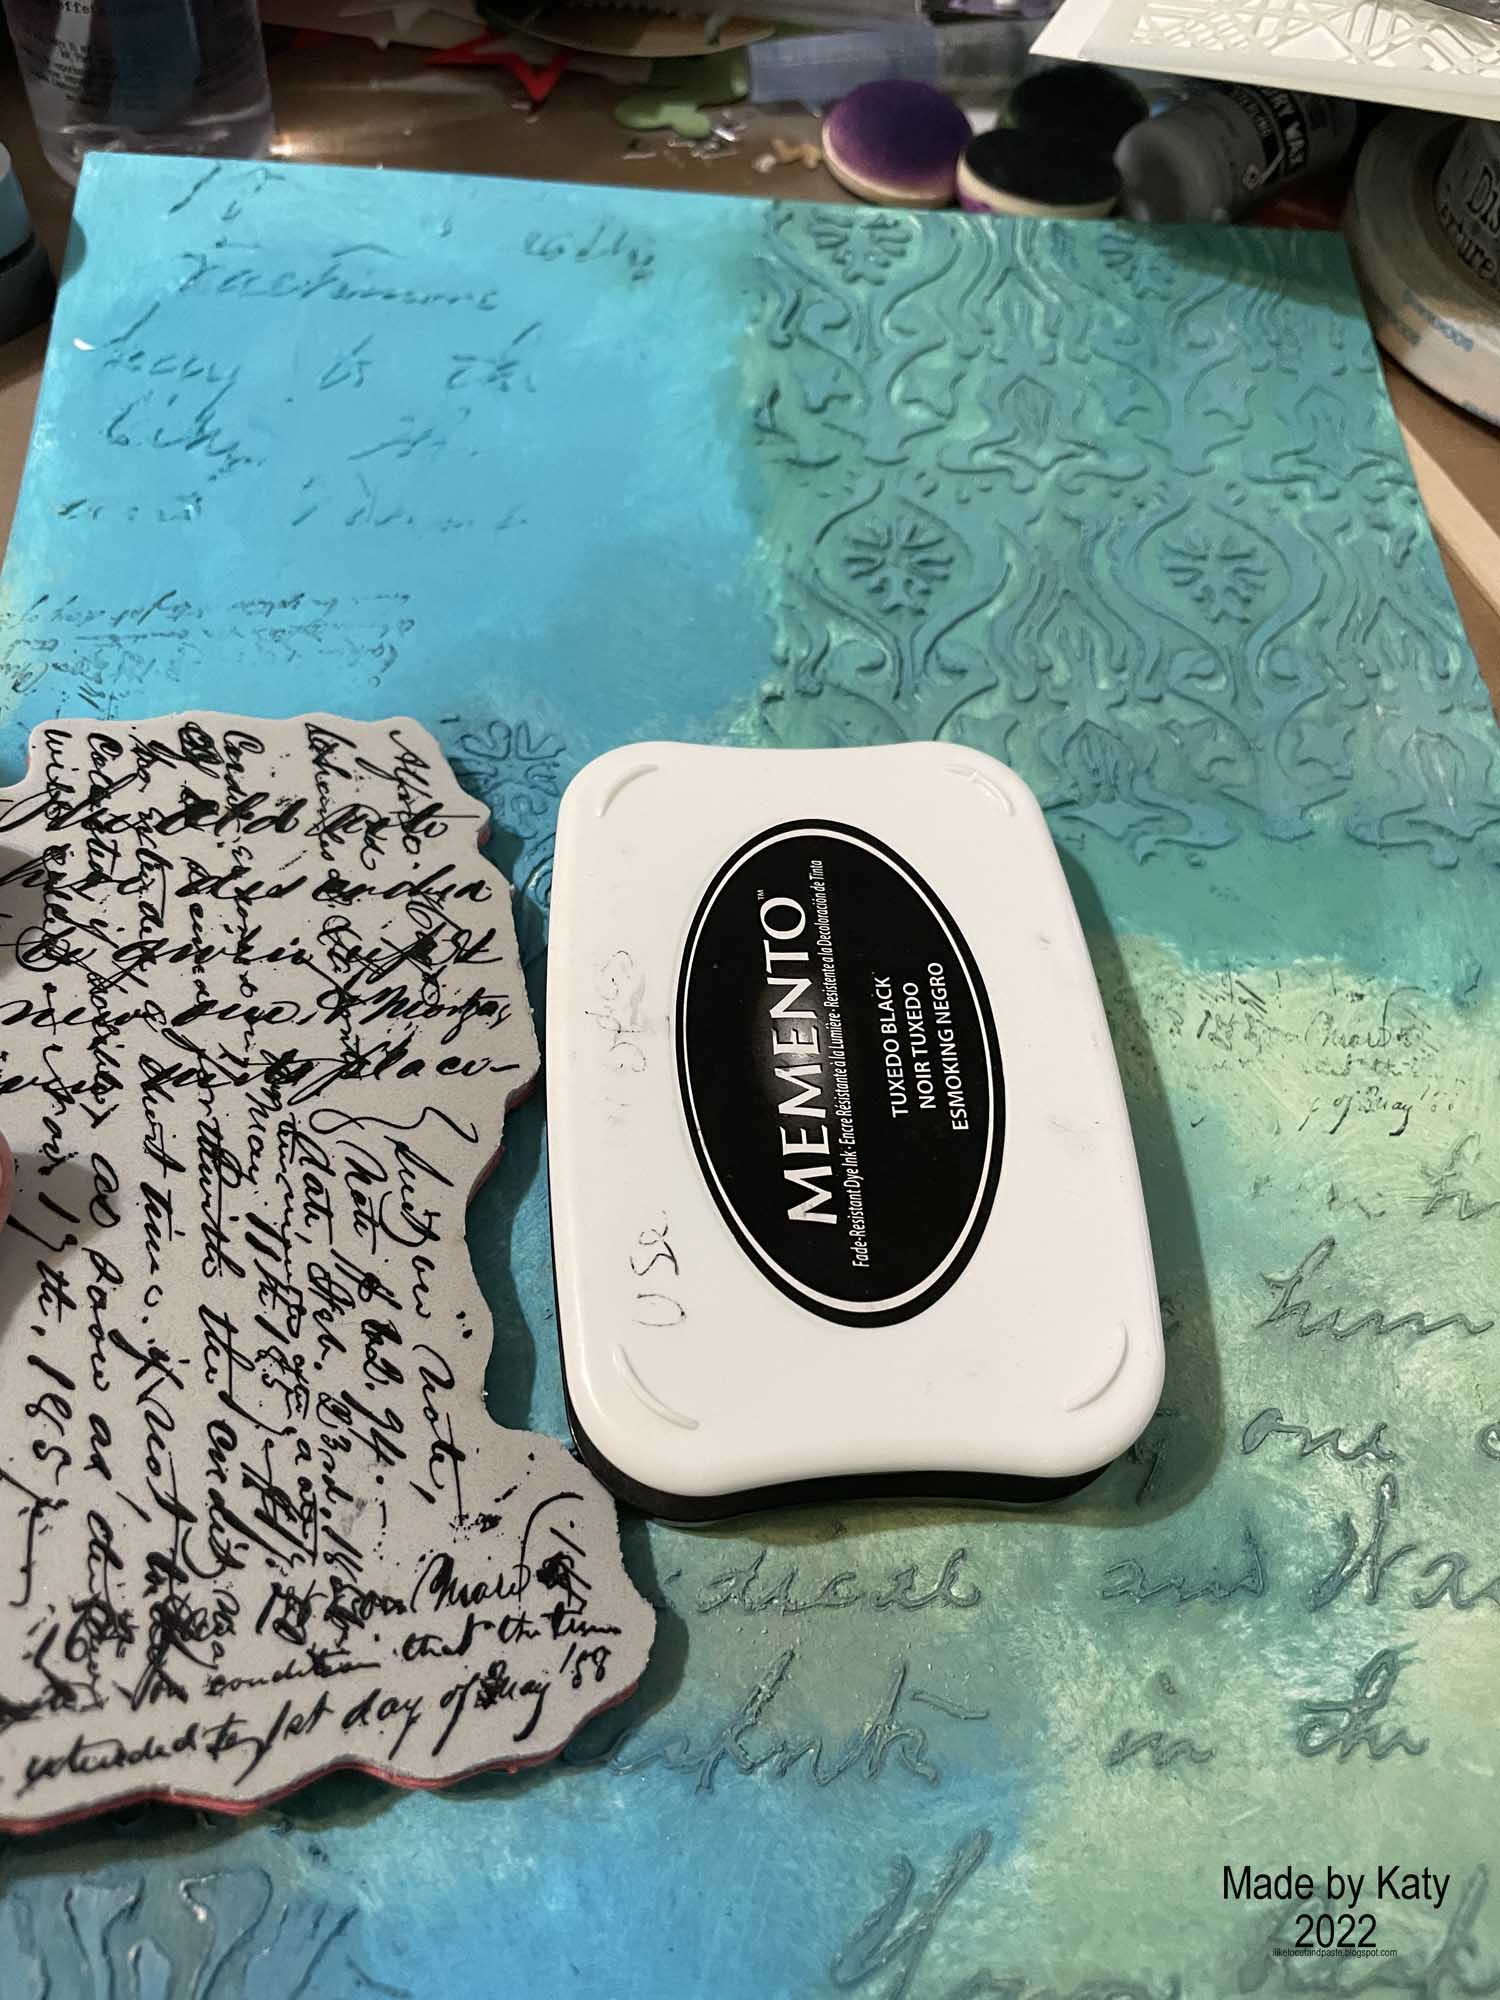
So I made this canvas board a long while ago. I guess I get distracted and this stays like this until now. (I have many other things started and not finished. I may have a problem.)  I painted it (with what I apologize I don't remember) and I used Finnabair stencils. They were probably new at the time and I just wanted to do something with them.


Here are the 2 stencils. (wait shouldn't there be a third? wait for it... ;) )


I also stamped a partial of this stamp in 3 areas, but 2 of those places were covered up. 


Here is the 3rd stencil. :)  Those are two clay bolts from a finnabair mold painted with raven black sparks paint.  Tim Holtz smile flash card-torn and inked with vintage photo.  And I think the paper with the words is a Tim Holtz snippet or something. (I have layers, ephemera, and snippets all in a bag so you know it's a little crazy in that dept)


This is a Paige Taylor Evans stencil and I used Peacock wax by Finnabair.


Here is the base. It's an artboard so it's thick but maybe not a thick as a thin canvas? I don't know.  These looked like possibilities when I bought them. So far 1 possibility so not bad :)  Oh and they measure 9 inches wide 12 inches tall.


So this is a little creative process here. I make the molds ahead of time. And I have a good many.  I love making them. :)  So this is me trying to figure it all out.


This lady and this whole piece here is a photo transfer from Finnabair. Like a big rub on in color. I just put it on a piece of cardstock and cut out the cardstock. I am sure they are meant to go in journals and stuff but my journal is small and I really just love this and thought it made a great centerpiece.


So here is how everything played out.  Gears, clocks, postage stamp, and an ornate metal piece.  I used these paper (I guess) ball like things and painted them purple to anchor all of the pieces. And I painted everything with a sparks finnabair paint. Some I rubbed a little wax on like the big clock-vintage gold. Oh and I highlighted parts of the background with Unicorn's Hair (one of my faves).


For the construction I used craft foam to lift some of the pieces. Like the camera girl got 4 pieces and then the pink clock 3 and the square stamp 2.  This is how I layered them-and I used hot glue-between the craft foam layers and the gears, clocks, etc.  The paper balls-I used glossy accents and a pin to move around the glue a little bit.  For the smile piece I used zip dry because I find that it doesn't wrinkle paper. I love this glue for banners also :)


And here is the finished piece again. Thank you for stopping by! :)


Saturday, July 9, 2022

Reversed Stenciling Card

 Hello Everybody!

I was watching youtube and ran across this Gina K. video on reverse stenciling-and I had to try it!

First-here's the card. And then scroll on down and I will tell you more :)


So I made this card-after watching a Gina K YouTube about reverse stenciling.  I applied these oxide inks to a 5 by 3.5 inch white cardstock panel. (colors salvaged patina, kitsch flamingo, twisted citron)


Not pictured is I put the stencil from the crafters workshop down and taped it. And then I used memento black tuxedo ink through the stencil. And the lines are the colors instead of vice versa. So cool :)

And then I inked some more cardstock and cut out flowers using the Tim Holtz die small tattered florals (661806). I stacked them and put a little gem in the middle of each. 

The sentiment is an oldie but goodie from Sizzix and I stamped the sentiment and banner and then die cut out the banner. And then I arranged the pieces.

Thank you for stopping by! :)


Sunday, February 27, 2022

Art Journal Page

 Hello Friends!

Over at Simon Says Stamp Monday Challenge the challenge was to create an art journal page. I was so happy about this prompt. I have started an art journal and it makes me very happy when I have an opportunity to create in it. 

My book size is 6 by 4. Here's my page:


Here is an up close pic:

I used a lot of Tim Holtz product-crackle paste, a stencil, the lady with villainous potion glaze on her, Media Marks die cuts, clippings stickers, and distress crayons hocus pocus and seedless preserves.  I used the crayons for the background and on the stars.

The background paper is a pack from Amazon that my hubs got for me for Christmas. The star stencil is Dyan from Ranger, and the paint on the pattern on the bottom right is Finnabair Sparks Raven Black (it sparkles and is just fabulous).  Oh and some golden black paint behind the words. The words are how I think I felt yesterday lol.

Thank you for stopping by! Until next time my friends keep creating! :)


Friday, February 18, 2022

Metal Heart Wall Decoration

 Hello Friends!

I am super excited to show you a metal heart that I decorated. At my work there were two metal hearts that were donated and my friend at work said we should have each make one and have a contest. Now my friend has mad skillz and paints like for real paints lol. I just do what I do. So I said ok. And then there was a little stress because I wanted to make an awesome. So here's mine:


I have some pictures of the process. Before I get into that I want to take care of business. I am entering this heart into the Funkie Junkie Boutique Blog: Valentines.

So the heart started like this-plain and shiny.


So the question with a metal heart--do I let the metal shine through? Do I cover it with paper? It didn't seem right to cover it all up. Also, I wasn't sure how things would stick to the metal so I covered it in clear gesso.


The gesso dulled the metal, but the metal was still there.


I used a finnabair stencil and some matte paste.  I love this script.


Then I used a Simon Says Stamp heart stencil with crackle paste.  Oh the crackles!


I have 4 different color pink paints. I was going for an antique look with pink and beiges. But sometimes the piece talks to you and the idea changes. So I used this pink paint sparingly and added water.


Here it is finished. It's also tough not knowing how I was going to cover the center. But I loved how the stenciled parts and paint turned out.


The window is a Etcetra window which means it's laser cut out of a thick material. I painted crackle paint over it. I cut a piece of watercolor paper to size and sprayed it with a distress oxide and one of the Christmas mica sprays.  The shimmer is so pretty!


Here's the middle. I used foam and hot glue to adhere the window. I knew I was going to tuck things under the window so I needed some depth.  Some of the flowers are from Hobby Lobby and some are those little flowers used in weddings. I believe the silhouette of the lady and the frame are Kaisercraft and I painted them with a pink sparks paint form finnabair and a black sparks on the frame. Then I used some finnabair wax to tone it down.

I cut some flowers and greens from Tim Holtz Sizzix Garden Greens and Funky Floral #1. The silver glitter leaves are cut from a table runner I bought at the Dollar (25) Tree in the party section. I had the ideology arrow and word coin. For the coin I used the picket fence crayon to make the word love pop. I used a wire to add the coin to the arrow. I glued flowers and added some micro beads on the bottom. 

There is some lace under the window and then the flowers and greens. The flowers look like little circle but I think they are supposed to be Lantana or something. LOL. And then the rest of the leaves layer up from there.


Here's another picture of the heart. I also added a clay bird sprayed with the mica spray winterberry-but very light. 


So that's my heart-but I know if I was reading this post I would wonder what did the other heart look like?

Here is the my friend's heart:


So she put a song Jack sings-like the sheet music in the background and burned the edges to reveal the metal heart. She painted Jack and Sally (I told you she had mad skillz). And she made the jar of Deadly Night Shade out of clay. So beautiful! 

Thank you for stopping by! 
Saturday, January 22, 2022

Pick -A Mixed Media Page

Hello Everybody!

Tonight I wanted to play along at the challenge at the Funkie Junkie Boutique Blog-out with the old and in with the new.

I created a page in my mixed media journal. The background paper and the definition pick were part of packs gifted to me by my husband for Christmas. The paper doll is fairly new also, I think from this Christmas's paper dolls by Tim Holtz. I colored her coat with winterberry distress crayon. 


Everything else I have had. The flowers are glitter alcohol paper and alcohol ink and cut from a flower Tim Holtz die cut set. I used pearls that I have had forever in the centers. The bee is a button that I cut the button part off of. I used an old corner rub on. Rustic wilderness oxide ink and a diamond stencil fill in some of the background. 

Here is my journal book. This one is small-but it just feels manageable. I have really enjoyed making little designs-I get to play with my stuff and keep it LOL. ;)


I am also submitting this into the challenge at Arty Divas: January Challenge Anything Goes. 

Thanks for stopping by! Happy New Year! :)
 

Wednesday, December 1, 2021

Rainbow Christmas

 Hello Everybody!

Happy December! Christmas is on it's way and I know I am very excited about that!

This month for the Rainbow Card Challenge we are all about Festive Rainbow! And this is a grand finale if you will.  This is our last challenge at the Rainbow Card Challenge.  It makes my heart sad, too.  Hey friend-"Don't cry because it's over. Smile because it happened" -Dr. Seuss.  So true right!  

We have had some good times and beautiful colors to be inspired by.  Some were challenging colors like Sage and Mauve (for me). Thank you to everyone who has joined our challenges over the years.  Big Hugs friends!

Now here's my card:


Rainbow Christmas is a challenge for me too-LOL. I am so programmed with red and green. But I love how this card came out. The background is funky and there is a lot of Time Holtz. Tim inks and villianous potion distress with his smaller snowflake stencil are in the background.  I used glitter white cardstock for the snowy ground. The buildings are from the silhouette design store. Santa is from Die-Versions.  The sentiment is a sequin.  And the little trees, deer, wreath, and snowman are Sizzix Tim Holtz.

The deer is from tiny snowglobes. The snowman and wreath are from Christmas minis. Now let me tell you about the wreath.  It is actually the inside piece to the wreath you cut out. And the bow is trimmed along the "strings" that hang down and the bow part itself.  And then I used a whole punch to make it into a wreath. 


Make sure you stop by the Rainbow Card Challenge to see all of the beautiful inspiration there and to say good bye. :) 

I am on instagram if you would like to follow me there :) just look for iliketocutandpaste

Until next time my friends have a wonderful holiday! 


Sunday, October 10, 2021

An Uninvited Guest

 Hello Everybody!

I am all about some Halloween right now! I made this 6X6 Magnetic canvas.

The inspiration for this canvas was the skull.  I made it using a Finnabair mould.  It's the largest skull.  I painted it with tim holtz spiced marmalade distress paint. Then I sprayed it with the tarnished brass distress mica spray to see what would happen. LOL It stuck on there! and then I used some black paint to highlight and tone down the skull.


I used stencil THMM128 so it had both skulls and that cross design. The stencil came with a halloween stamp set that is Tim's/Stampers Anonymous from Joann's.  I used a Golden light modeling paste.

I sprayed the canvas with the distress mica stains-flickering candle, jack o lantern, bubbling caudron, and hocus pocus. I didn't use gesso. I sort of went back and forth on this because I usually do but I liked the linen texture showing through.

When the mail came my order from Simon Says Stamp was delivered-Woo Hoo! and in it I had ordered the transparencies and that is where the bat wings came from.  I used the black mica flakes from Tim also. I love them! and then I used black micro beads from recollections.  I also die cut a leaf branch from the sizzix/ Tim Garden Greens 661206. I used the same one like maybe 6 or 7 times and cut it out of black cardstock.

Oh and that cute little scared ghost is from the Frightful Things die cut. This die cut set is seriously one of my favorites for Halloween.  I used a spring from Hampton to make him 3-D.


I am entering this Halloween canvas into the following challenges:


Crafter's Castle: Anything Goes #46 Theme fall and fall holidays

Thank you for stopping by! 


Thursday, April 1, 2021

Pretty Yellow Daffodil!

 Hello Friends!

Happy New Month to You! We have a new challenge at the Rainbow Card Challenge. This month we are all about Daffodil. :) Check out this inspiring color board!


So this is what I did for Daffodil:


I used a dylusional stencil and art anthology yellow glitter dimensional paint to create the background. I made the pineapple using my silhouette machine. I used a little rustic wilderness distress oxide on the pinepple leaf. And the sentiment is a free stamp from a purchase from Taylored Expressions. I used mulberry paper behind the pineapple and pop dots. I stamped on the mulberry paper also and added some sweet little flowers from Paper Studio (hobby lobby).

Here is an angled look at the card. This way you can see the dimension and glittery goodness of the background. 


I hope you are inspired to get out all things yellow and make a fabulous card and link it to the Rainbow Card Challenge. We would love to see you! 

Thank you for stopping by! :)


Sunday, February 14, 2021

Happy Valentine's Day! 2 of 3

 Hello Friends!

Here is the last frame I made out of the six. It's for my nephew who likes Stem.


I gessoed the wooden frame first. And when I painted it with paint I could see areas that didn't get paint. So I left it like that-you can see the white peaking through. I feel like it adds personality to the frame. I used a Tim Holtz stencil for that computer board looking lines and Finnabair gold wax. Then I added clay stars and used vintage gold Finnabair wax on them. I glued little metal gears to the others side and a clay heart with wax on it. I stamped the atom and the carbons at the top using Close to My Heart stamps and Ranger Archival ink. Those stamps go with a chemistry stamp set-so cute! I got it a few years ago. 

Thank you for stopping by! I hope your day is awesome! :)

Saturday, February 13, 2021

Valentine Frames

 Hello Everybody!

Welcome to Day 13 of my 14 Days of Valentine's Day Craftiness.  I am excited to show you the frames I decorated in a pack that I bought from Hobby Lobby.  I showed one yesterday and I am going to show you 4 today. So I am leaving 1 frame for tomorrow. :)

All of the frames started like this:


I either gessoed it or


I put light modeling paste through this simon says stamp stencil.  


From there I painted and decorated. I First painted this frame pink.


Then I added a little white paint and sprayed water on the frame. Then I added some crimson Ken Oliver watercolor powder.  And then I added some purple.


Here you can see a close up. So fun! I also hot glued some paper studio flowers and this cool snazzy heart both from Hobby Lobby. And the butterfly I had in my stash :)


The second frame was just gessoed. And I didn't have any purple craft paint so I borrowed some fancy acrylic paint from my husband how does fine art painting from time to time. Swoon! This color is so pretty!  I was able to create an ombre effect. I had this love charm and hot glued the back of it so it wouldn't come off and get lost. I also had these paper flowers from Kaiser and they matched the ombre perfectly.


This frame recieved light modeling paste hearts. I painted with the same purple paint as above but just did one color. However if you notice the top left and bottom right corners are a bit white that is because I used a white matte Finnabair wax on it to give a little highlight for dimension. The flower is a clay flower I painted with Finnabair Opal magic Pink paint so sometimes it will have blue colors in the light.  Then I used twine for a metal key.  I also painted the 3 wooden hearts with the same opal paint.


I painted this frame red after the light modeling paste dried. I hot glued the Paper Studio paper flowers to the corner. And then I balanced it with another jazzy gem heart from Hobby Lobby.


These were so fun to share with you! I hope you enjoyed them also. Thank you for stopping by and I hope you come back tomorrow to see the last frame and the rest of the Valentine's Day projects. :)