Showing posts with label {Pin}spirational Challenges. Show all posts

Saturday, August 4, 2018

Hugs Birthday Card

Hello Everybody!

Let me show the birthday card I made for my friend-and then I can tell you about it! :)


I was looking for things that my friend likes-and I didn't have much (in the way of farm animals and cowgirlish type things).  And as I was looking for something else (isn't that always the way?) it occurred to me that I am giving the card so it was ok if it was more a me card than a her card.

I like to make cards for people based on the people-I know many of us here in blogland do-that's part of the fun of make cards for our friends and family.  But I saw this old Stampin' Up stamp which reminded me of my spazzy self.  I used a Spell Binder die to make the cool scalloped circle. I saw the background that I had created for a different project but didn't work for that project.  (which is a stencil and distress oxides)  And then everything else came together.  I used Thickers foam letters to spell out Hugs because it was fun and we are always hugging. :)  LOL.

The cut little butterfly is from Queen and Company and the sparkly flower sequins are from Pink and Main.  I colored my spazzy "self" with Copic markers. :)  I used Nuovo Embellishment Mousse around the edges of the card to give them a little sparkle.

I would like to enter this card into the following challenges:

{Pin}spirational Challenge #221:  The photo inspiration:
Here pink dress-definitely an inspiration to this card.  But I hope she doesn't sit up to fast-the top doesn't look that secure.  And she's going to need hugs if she falls off of that bike with those shoes.  (LOL I'm teasing I'm sure this is a photo shoot sort of thing and she's a model.)


Cute Card Thursday: #541 Anything Goes

Watercooler Wednesday Challenge: #182 "Anything Goes with a Feminine Twist

Thursday, September 28, 2017

Mermaid Birthday Card

Hello Everybody!

Sometimes I look back through my blog for a technique or a card I made.  And every now and then I come across something funny.

I made this card for a friend of mine.  It's late (ugh!).  Her birthday was August and she won't get it until October because all of a sudden September is almost over.  LOL. 

So I was going through my blog and found a blog entry around this time last year--for the same thing.  A birthday card for the same friend---and the same tardiness.  Wow.  How does that happen?  LOL.  Here's the link in case you wanted to see.  It's Throwback Thursday so I'm on time for something, right?  LOL.

Moving along---Here is my card using a mermaid stamp from Sparkle N Sprinkle and the sentiment is from Rubbernecker stamps.  I used Copics to color her and the "water" is distress oxides. 


I masked the mermaid which is white there is this glow around her.  It was hard to get a lot of ink into the spaces of her hair.  The shell is a button that I cut the back part off.  And then a little bling. 

I am entering these into the following challenges:


Thank you for stopping by!  Until next time my friends...keep swimming! :)

Birdhouse Makeover

Hello Everybody!

I am so excited to share this project with y'all.  It's been awhile since I've made a project like this.  There's a lot of pictures so get ready!

I bought this birdhouse at the thrift store.


Here's the back.  I paid $2 for it.  Woot! Woot!  It's time for a makeover!


I'm not sure what direction I'm going to go in.  So I gesso it in case I decide to paint it.  And I took off those sad little butterflies that look like moths.  LOL ;)


So I decide not to paint it.  I am going to try to steampunk this birdhouse out!  I have foil tap paper.  But I'm curious to see if Aluminum Dryer Vent Tape will work because I don't have enough to cover my birdhouse and this is more readily available.


I use Ranger/Tim Holtz alcohol inks-grey and black on the aluminum tape.


Then I take the piece and run it through my embossing machine using a T.H. brick embossing folder.  So far so good.


I use this red pepper alcohol ink to make the bricks red.


That looks cool. :)  I peel off the adhesive back and mold it to the birdhouse.  It's already in strips because of how the tape comes-so the width is handy in this project.  I don't have to do a lot of trimming.


Here is the finished birdhouse.  Keep scrolling for side pictures and closeups. 


I used the same technique for the roof-but I used the "metal" embossing folder.  Still a Tim Holtz embossing folder.  I added these cool metal gears my husband got me one Christmas.  I think he bought them from Amazon.


Here is the back.  I couldn't figure out if I should do something on more on the back.  But it's the back-and except for y'all-who's going to see it? :)


This is the left side.  More cool gears.


This cool metal bow came from a Steampunk Show I went to.  I love it!  The house number is a Tim Holtz ideology thing.  Love! :)


The bird and metal flowers are Tim's.  There is a gear in the center of the left flower-it's from where my other gears came from.  And I used a Tim Holtz wire with a circle thing for the stem of the flower.  I had to use a white Faber-Castell marker to kind of highlight the metal pieces.  I used alcohol ink on them and everything was so dark.  The white sort of out lines the pieces and makes them pop.


Here's a closeup of the bricks.  I love how they came out, and they have a nice shine.


Thank you for stopping by.  :)

I am submitting this Steampunk Birdhouse into the following challenges:


Until next time my friends...keep that steam going! :)


Wednesday, December 28, 2016

One More Christmas Card

Hello Everybody!

Wow!  It is almost a New Year.  It's always exciting-like a fresh start-when the new year comes around.  New goals are set.  Last year my goal was to set more glitter.  And do you know what?  I failed.  LOL!  I think I used less glitter last year than I ever have.  And I'm talking about all glitter-glitter paper, loose glitter, and Stickles.  I realized this toward October or November.  But really too late to fix it.  Oh well.

So for now-I haven't made any real goals yet.  I just want to make more stuff. :)  And share it with you guys. :)

So I have a Christmas card to share.  The last one for the year.  And it's for someone my husband works with who likes the vintage style of cards.  So when he asks me to make her one-I happily do because I love this style too.

The pink note background paper is My Mind's Eye from their Love and Found collection (a few years old).  The mistletoe is a button.  The floss is floss.  And everything else is Tim Holtz!   Even the corrugated panel.  I did use a little gesso on the panel to brighten it up.


Here is a closeup of the charm.  


I even stamped the inside! (Which I am proud of my self for doing because I usually leave it blank.  The sentiment is from Hero Arts.


I would like to link up to the following challenges:

{Pin}spirational Challenges #181:  Photo inspiration-I love this picture.  I pulled the pink and blue from this.  I love how feminine this picture feels to me and hopefully I transferred some of that to the card.  

Use Your Stuff: Show what you are working on.  

Sunny Day Crafting:  Anything Goes

Thank you all for stopping by!  Until next time my friends...Happy New Year! :)


Friday, May 6, 2016

A Card for Mom

Hello Everybody!

I just put the finishing touches on a card from my mom for Mother's Day.  If I had just started a couple of days earlier I would be totally awesome.  But since I'm not-and I have to mail my card-I just decided I would embrace by tardiness.  It's possible my mom knows I'm going to be late anyway-LOL.  :)

So here's my card:


The background is from when I was making gelli prints.  If you want to check out that post go here.  Then I used a stencil (I don't know from who) and Wendy Vecchi's crackled texture paste.  

Once that dried I used glossy accents to glue on the flower (prima) and the center which is from Jolee's boutique (it's old lol).  The I stamped a few swirls-the small ones on both side are Heidi Grace and the one in the corner is way old from Stephanie Barnard.  The I glued some Tim Holtz hearts and mom stickers from Making Memories.

I'm really excited about it.  So time to get it ready for the mail.  But before I do, I need to submit this card into the following challenges:


Thanks for stopping by!  Until next time Happy Mother's Day! :)


Sunday, May 1, 2016

CAS Challenge

Hello Everybody!

A new month means a new challenge at Creative with Stamps!

We are so excited with the participation in our Butterflies Challenge.  Thank you to everyone who joined us.  It was an awesome treat to see your creations! :)


For my CAS card I used an older Stampin' Up Stamp and sentiment.


I stamped this sweet lady onto a die cut from Spellbinders.  The inks was SU too-brilliant blue.  I used Copics to color the sweet lady. I round the corners also.

So be sure you link up your CAS cards this month!  We can't wait to see what you make! :)  

I am entering this into the {Pin}spirational Challenge: image challenge.


Until next time my friends-please pass the sugar. :)


Friday, January 22, 2016

Sunshine Inspiration

Hello Everybody!

How is everyone doing on the New Year's Resolutions?  Do you make resolutions?  I have a couple-1. To use more glitter!  and 2. To make more things to blog about!  I looked at the blog posts for last year and the years before.  Last year was a little low so I am going to work toward blogging more.  

So I didn't use glitter but I did use an image from a Day for Daisies digi stamp.  And I used watercolor crayons from Stampin Up that a friend of mine gave me.  Yay!  And it was a lot of fun to watercolor this image.

The sentiment is from Fun Stampers Journey and the polka dots on the reddish strip are from a Stampin Up stamp.  (I'm proud of myself for that.  Otherwise that paper would be plain.)


This card was inspired by the challenge at {Pin}spirational Challenges.  Here is the picture inspiration #157:


The background paper was totally inspired by this picture.  It came from Hobby Lobby.  :)

There is still time to play!  Thanks for stopping by!  Until next time my friends...stay warm-brrrr!

Tuesday, March 10, 2015

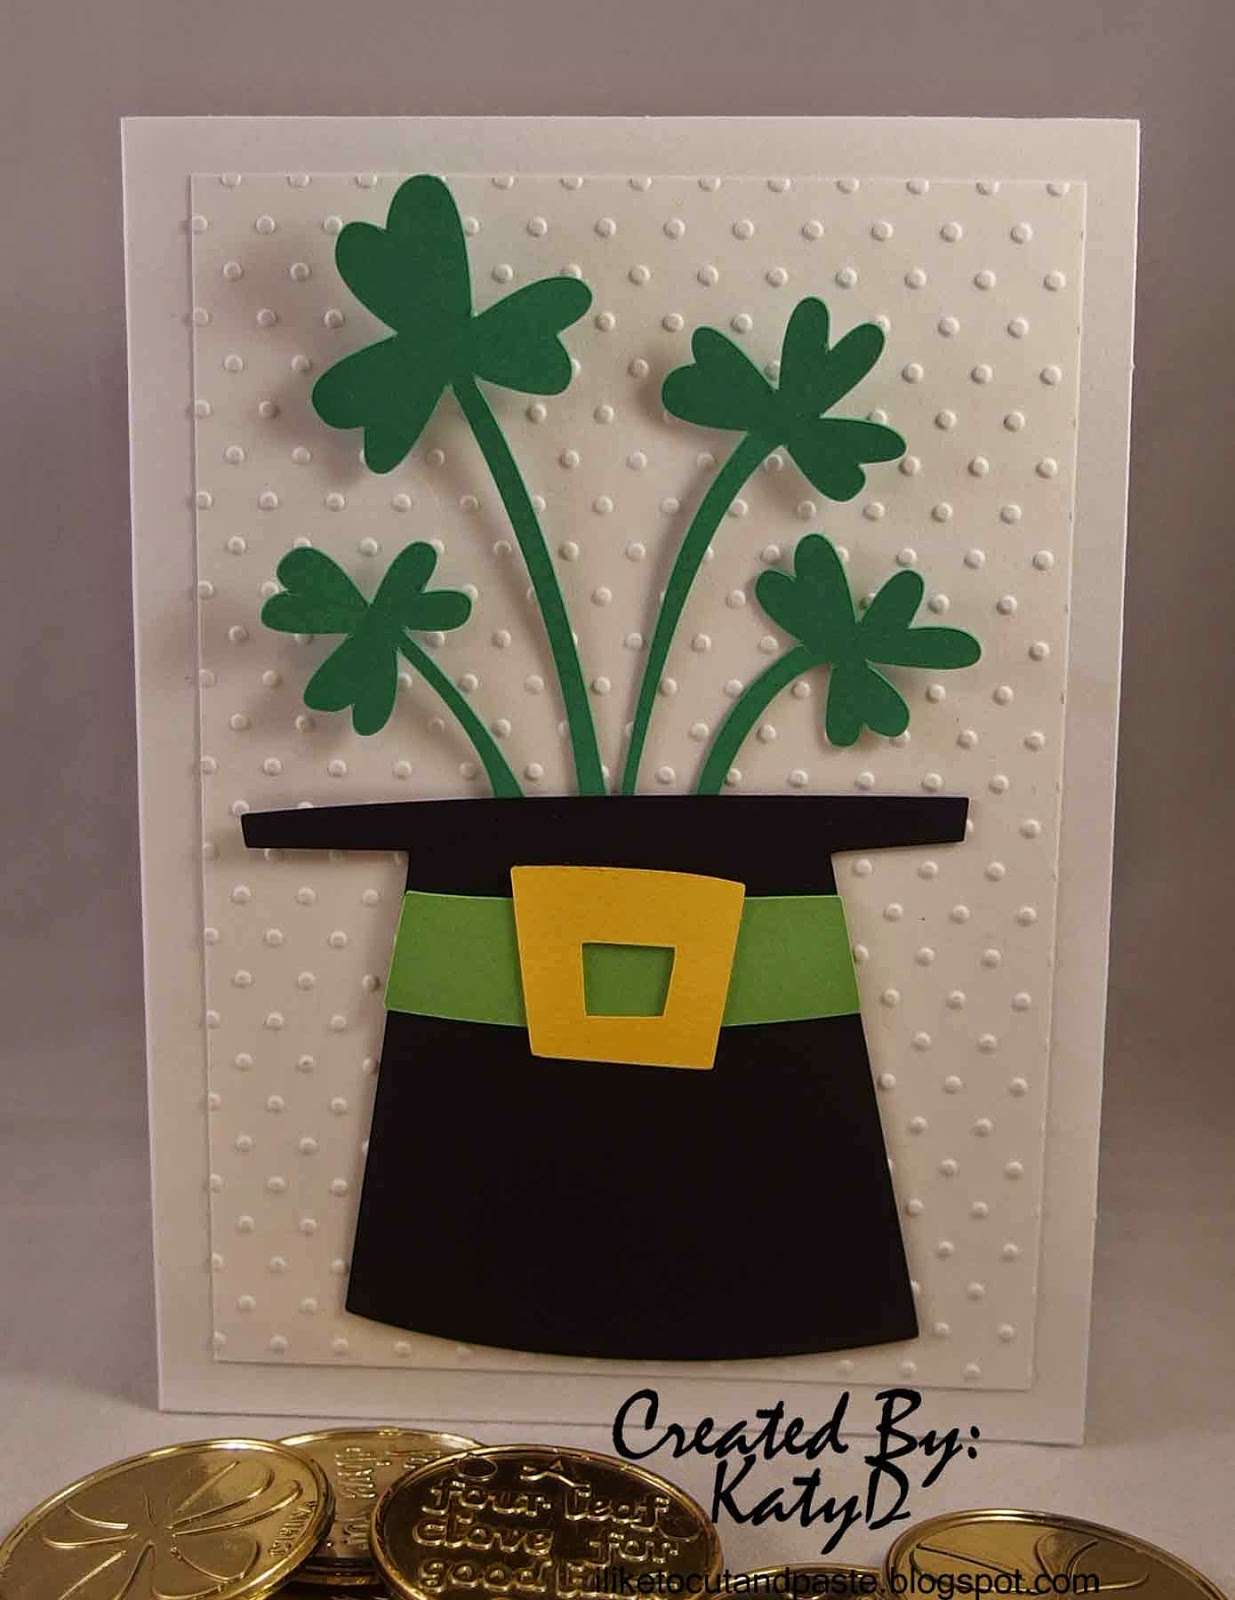
Hat o' Shamrocks

Hello Everybody!

I made a card using this super cute image from Silhouette (cutting machine).  I love their images and spend lots of time just looking at them.  Finally, I cut something out!  ;)


I embossed the panel with Swiss dots on the cuttlebug.  I used scraps (yay!) for the hat.  

I would like to enter this into the following challenges:


Stuck On U Sketches: March Die Cut Challenge: Lucky Green (the hat and shamrocks are the die cut from the Silhouette Store)

Thank you for stopping by today!  Until next time my friends...Good Day!

Friday, August 15, 2014

Fun Butterfly Cards

Hello Everybody!

It's my turn at the Great Impressions Blog!  I am going to show you 3 cards using the coolest butterfly stamp!  Are you ready?  I am! :)


I made 4x4 cards out of white cardstock.  I used the following stamps:  E843 Flowery Butterfly, B151 A Little Hello, B240 Sweet Happy Birthday, and B193 So Thankful For You.  All of these stamps and more can be found at the Great Impressions Online Store!

For this card I used Tempting Turquoise ink from Stampin' Up and matching cardstock that I embossed using the Swiss Dots folder.


I used Pink Passions from SU here with matching paper.  I found a pink floss that matched-yay!  The white panel is pop dotted.


For this card I used Orchid Opulence and a matching cardstock-both from SU.


I have to say it again-I love this butterfly!  These are fun and easy cards.  I don't know if I will give them out to friends or give them as a set to someone-Decisions! ;)

Keep up with Great Impressions with Facebook and Pinterest!  Our Happy Birthday Challenge is still going on-so link up with your Happy Birthday Project today! :)

I am linking up to the {PIN}spirational Challenge: Anything Goes #120.

Until next time my friends...Have a beautiful weekend! :)


Monday, February 10, 2014

Queen of Hearts

Hello Everybody!

***I won a prize at {Pinspirational} for this card. Thank you!**

I feel like I have been MIA but I'm not-I have been working on my Valentine's.  It's Friday-I hope to have them in the mail by Wednesday! LOL!

Here is one Valentine's Day card featuring the Queen of Hearts from Disney's Alice in Wonderland.  I used my Cricut machine to make her.  I had to use white cardstock for her skin and colored it with Copics.


The hearts are from the same cartridge Disney Classics and actually the same page.  I really like them and might cut some more.  Her eyes look a little funny because of how they get cut out.  But don't mind them haha!

Here is a side ways version.  I pop dotted the Queen over the hearts.  I used a swirl (Old Stephanie Bernard stamp) at the bottom.  The paper is from Pink Paisley-Cottage Farms.


The inspiration for this card came from the the challenge at {Pin}spirational Challenge.  It's this picture:


I am also linking this card up to Cut It Up: #38 Valentine's Day.

There are so many things you could do for this--books, use the colors like for a Christmas card, etc.  I chose to dive into the Alice book and take out a character.  :)

--Remember if you are making Valentine's Day things with Hearts you can link up to the Scrap It Girl Challenge too! :)

Thank you for stopping by!  Until next time my friends...time for more pink and red! :)