Hello Everybody!
I am super excited that I am the Guest Designer for the 2nd time in a row at The Funky Junky Challenge! I am so honored that they chose my project. :)
This challenge's theme is Industrial Grunge. Did they say GEARS?!? Yes Please! :) Here is my project and then I will break it down. :)
The story is that this fella won first place at the World's Fair :)

Here is a closer look of the inside of the vignette box. I used the corner die cut from Sizzix Gearhead on the outside of the vignette box and then there are clay gears and one wood gear on the inside.

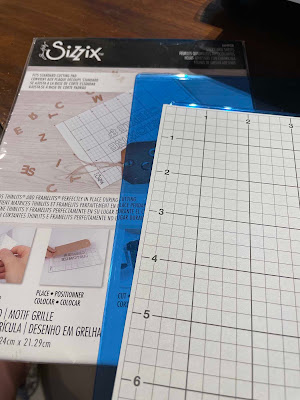
I cut out all of these gears-LOL. I got this for Christmas and this is my first time using it so yay! This is Tim's gold foil cardstock.

On the left is silver Tim cardstock and on the right is Ranger's/Tim foil adhesive sheets. There's a difference in that the one on the right has a texture where the cardstock is smooth. I used both but I thought this was a cool observation.

I used black gesso and painted the biggest vignette box. On the bottom I missed a few spots-but turns out this added to the charm of this little display.

On both pieces I used these alcohol ink colors and pounced with the felt tool. (rust, mushroom, slate, caramel, pitch black, latte) I used the mini foundry embossing folder.

The foil tape was the longest of the two so I applied it to the top and the foil cardstock pieces to the sides.

I cut out green tim foil cardstock and embossed it with circuit. I tried to put black alcohol ink on the raised part-fail. LOL its on the center left because I didn't start over. I just went with it. I used a gold prisma color marker and highlighted random lines. I was thinking this guy was into clean energy-so the gears aren't full of oily gunk ;) lol

The gears were fun. I had previously made them with clay and Finnabair moulds (mechanica and large gears). I have a whole collection of clay pieces because it's just fun to make them LOL. It is more fun to use them in projects :) So I painted them with this gold paint (no gesso or anything), and then I used slate and pitch black alcohol ink to lightly go over the gears. Clean energy still needs a little bit of grease ;)

The bottles!! So fun to make. I was looking around Pinterest trying to figure out how exactly I was going to do this box with grungy goodness. And then I saw this pin/post from Emma Williams-Toxique. Her project is awesome and she tells how she made these bottles which I did here.
The bigger bottles are from the dollar tree and the small one is from the miniatures section at hobby lobby. I painted collage medium on them and put some hot glue drips. These bottles are small by the way. I also added some rock candy crackle to them.

Emma uses greens and blues on her bottoles and I thought that was really cool. Like maybe I would have just used brown. I like the pop of color these give. Then I added gold and silver alloy to the tops of the hot glue drips. I also find a tiny label in my snippets and add a skull rub on from this years Halloween rub on sheet. I also use another rub on directly to the bottle from the same Halloween rub on sheet.

I was watching Tim's Easter crafting video (from Sat.) while I was making this on Sunday. And that is where I thought coloring the baubles was a good idea. It's possible something else influenced that but I can't remember where. I used red pepper, currant, and pitch black. Again the little pops of color are fun.

Here's a close up of the finished bottles and baubles.

In looking for tiny bottle labels I found this geometry equation looking ephemera in this year's Halloween pack. I hot glued it to the box and you can see some of the hot glue.

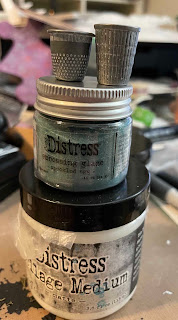
I took black paint and Tim's grit paste and mixed them creating a gray mixture that I used to hide the hot glue and I put it on the "seams." To me this is just a nice finishing touch to the project. I went back and painted black paint on top of the grit paste to make it darker and more grimy.

It makes me nervous to color the paper dolls LOL. And he seems really good already and I didn't have another guy like this so all I did was color his flower yellow with a prisma color marker. It's a very little thing but it's there LOL :)

This is going back a little bit-I put single gears on both of the insides (left and right) of the box. The clay gears are hot glued in. There is also one wooden gear that fit the size I needed (it has less detail that the clay ones and is partially hidden with the corner gears.

Here's a close up of him standing on a gear. This is a sizzix die cut gear.

Here's a closeup-there is a light bulb from Tim (a loooong time ago) that I used sunshine yellow alcohol ink and hot glued to the top. I love light bulbs-which is why I still have a pack of unused Tim lightbulbs. They are for special occasions LOL. The exhibit a strip has fossilized amber distress crayon to make the letters pop. It is also hot glued in so it stands. I have wire on the sides through the holes. I took a little black paint and went over the top. And there is the gray grit paste to help cover the hot glue. I also put a few spots of grit paste in the bottom of the box.

Here is a one side view of the vignette box.

Here's the other side view. Here you can see his blue ribbon :) This is an ideology piece that I used sailboat blue alcohol ink to color. Oh-I also used an ideology hardware piece that screws into the vignette box and then I used a jump ring to connect the ribbon charm to the piece that screwed into the box.

And that's all I did. LOL. This was super fun to make. I am so happy that I was able to be a Guest Designer of The Funky Junky Boutique Challenge. I hope you will the challenge! :) (you could be a guest designer or winner of a $25 gift certificate!)

Thank you for stopping! :)