Hello Friends!
This is sooo exciting--I am a guest designer today for The Funky Junky Boutique Blog challenge. This is the first time I have had a project win overall winner. I am very honored. :)
The challenge "Rather Blustery Day" is all about using supplies or techniques that you having a hard time using. I chose the Village Collection dies from Tim Holtz. I have made 2 houses and they are still floating around in my craft space. They are ok-I didn't like how they turned out.. And after I made those two houses-I haven't touched this die set again. Until now! I thought this is the perfect motivation to use this die set. So I set out to make a church. I was going to try to make a steeple. deep breath
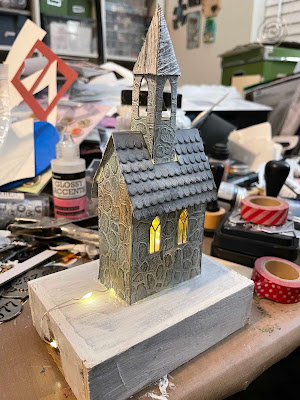
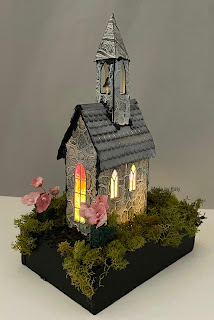
Here is my finished project. I used a lot of products and techniques, and it was super fun. I know why I don't automatically reach for this set and that's because it is more of an exact type of craft. I'm not great at measuring (I like to eyeball) and I am not always tedious-a little more messy and just see how something turns out kind of person. However when you build a structure there needs to be some precision.
This church makes my heart so happy! So I am going to post more pictures of it. Here the lights are dim to show off the tiny lights and "stained glass" windows.
Also, I am going to post process pictures-those will show what colors I used (for the most part). I take photos to remember what I used-it's a little easier that way. You will see my messy desk LOL just disregard that. Yeah, I'm a messy crafter for sure. LOL :)
So first more pics of the cobblestone church. One goal I had was for the bell to ring. And it does!
Before I show you my process here are the links to help. They helped me. And I just want to show how I created mine-but these are better tutorials:
I used these embossing folders for the cobblestone and wood (bell tower roof). As you see-I have the whole collection but didn't use the bricks or foundry on this project.
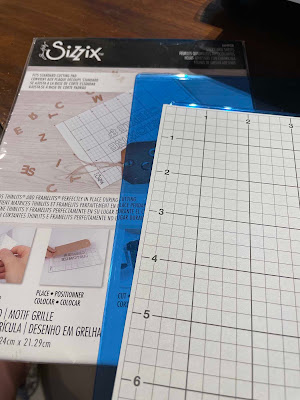
At Christmas I received two set of cutting pads. So one set I saved for the day I would use the sticky grid and cut out houses. Yeah that the day has come! :)
So I thought I measured right-but no I didn't. The windows on each are different. So I cut more and maybe have enough for another house. (that's in a pile marked later lol)
So the base of my house is regular cardstock. I have watched videos and Tim says to build it out of something a bit more stronger. Next time I will. LOL maybe that's why things get a little wonky.
We have windows and doors.
So I think next time everything should be cut out of black cardstock. Originally, I wanted to save time and just do the front and tower out of cobblestone but when I added black distress ink to the corners it wasn't clean. So cobblestones for all the walls!
Here are the inks and crayon I used for the cobblestones. The crayon is awesome!
I have mica tiles which I have never used before. I used alcohol inks and cut the pieces down to size. Then I glued them to the windows before sealing up the house.
Love! And that's when I knew that I needed to find my clear tiny lights.
It's shaping up. I used Allene's tacky glue to adhere it together and put on the cobblestone.
So for the tower before I put on the cobblestone piece I colored the windows with this marker from faber-castell. Below the marker you can see the cobblestone and the gold frame windows. The gold is from Tim's gold cardstock.
I got out my heavy mixed media paper from Tim and sprayed it. This is what the roof shingles are made from. I chose this paper so it wouldn't warp.
So here is the front of the church. I am mounting it on a vignette box-the 2nd largest one. I painted it with white gesso. The tiny lights are on.
Here is the back side. I used a hole punch to make a small notch in the back of the church for the wire to go through. I made a hole in the vignette box using a hand crank drill by Fiskars. The battery pack is on the underside and the lights fit through the hole.
I painted the vignette box. Here I'm trying to figure out how I am going to cover the vignette box around the church.
I used grit paste mixed with black paint to make a mortar type thing, and I put it where the tower is on the roof and underneath the roof and the spire. I applied it using a toothpick since those spaces are so small.
I added a gravel walk way. The little little rocks are from the dollar tree.
Then I decided that I didn't like the green paint. I repainted the base black. The arrow is pointing to where the wire comes in.
Here's a close up of the gravel walk way.
I sprayed mica spray on these ideology flowers.
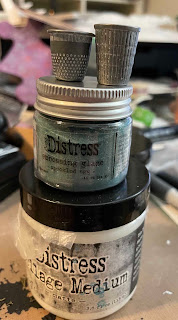
I had to watch another video to see how to glaze metal-LOL This was magical.
This isn't the best picture but here are the thimbles glazed. I am going to use these for planters :)
Here is the battery pack. I hot glued it to the roof of the vignette box.
And that's it friends. Thank you for stopping by today. Extra thanks if you made it to the end!
I'm so thankful for this challenge to make this church. It was a lot of fun. I look forward to the next structure in the village collection. :)
Until next time my friends-keep on makin'!