Showing posts with label Challenge. Show all posts

Sunday, November 18, 2012

Wishful

Hello Everybody!

Today I am sharing a Christmas card I made for the following challenges.  Each challenge inspired an element on this card.

Simon Says Stamp and Show: Stamping Without Ink-I used silver embossing powder on the snowflake stamp


Unscripted Sketches: Sketch 185


CAS-ual Fridays-Winter project featuring blue-CFC79


Here's my card.  I just bought some Martha Stewart snowflake stamps.  This is one of them (yay! I am already using them!)  I embossed it with silver embossing powder.  The white square behind it is where I took the Versamark pad and made the square and then used white embossing powder behind it.  Wishful is from the Tim Holtz word stickers.


Here's a closeup.

Thank you for stopping by!  Until next time my friends...It's beginning to look a lot like Christmas! :)

Friday, November 9, 2012

Me and You at Disney World

Hello Everybody!

*So exciting-this layout was in the Top 3 at Shopping Our Stash.  You can see it here! :)

Happy Friday!  I love Disney!  Everytime I go it really is like magic!  Leave your worries behind!

A few days ago I went to Joanne's and they had Disney paper on sale!  So I had to get it!  This is what caught my eye:


I have seen this in Paper Wishes.  There are brads and 2 Brad Buddies that come with these papers.  Also, there are some die cuts inside.  I am an instant gratification person though.  I like stuff now-which is why just look at it in the magazine.  But when I saw it-I had to get my hot little hands on it! ;)  This paper kit (that's what I will call it) is from Hot off the Press.

So here is my first layout with my new papers.  I used the sketch 11-7-12 at Let's Scrap.  I am also entering this into the Shopping Our Stash Challenge #76: Best Deal Ever or I Had to Buy It, It was on Sale!  I bought some chipboard pieces and Mickey Mouse stamps (eek! can't wait to use those) along with this Disney paper kit. :)


Thanks for stopping by!  Until next time my friends...have a Magical day whether you are at Disney or not :)

Friday, November 2, 2012

Mirror Mirror-Who is the Steampunkish of All?

Hello Everybody!

I know I am not the most Steampunkish of all but it doesn't make me love it any less!  Gears, clocks, keys, oh my!  This is one of my first all out projects using a Steampunk theme.  So let me show you, and I will tell you more about it as you scroll down! :)

I am entering this piece into the following challenges:

LESSology: Challenge: #19 Mirror, Mirror on the Wall--upcycled mirror

Simon Says Stamp and Show: Just Add Pearl--Perfect Pearl Mist and Pearls on the Butterfiles

So here is my mirror.  Eek!  I am so happy at how it turned out.  The mirror itself is 14 inches long plus the frame around it.  I upcycled the mirror.  I bought it at Goodwill for $4-Score!! :)  There is a mix of pictures taken from inside and outside.  Experiments with lighting-what can I say?  :)


Here's another picture of the mirror. :)


Here are the gears that go up both sides of the mirror.  They are from Tim Holtz die cut.  I painted them with gold dabber and then rubbed black stamp ink on them.  Some have a little bronze distress stain.


Here is the right side.  That pocket watch is Jolee's.  Rubons are from 7 Gypsies and well as the hooks you will see.  There's a lot of Tim Holtz Ideaology on here also. :)


I put a few butterflies to bring in a feminine element.  For the butterflies I used music paper cardstock, Martha Stewart punch, Want2Scrap pearls, distress inks, Perfect Pearls mixed with water.


The hooks are from 7 Gypsies, the gear is from Bead Landing (the ones my husband bought me in my last post), and Tim Holtz philosophy :)


Here are more of those cool gears mixed in with Ideaology and a butterfly.


Here is the top of the mirror.  The 3 men are one of Tim Holtz's stamp.  I used black embossing powder than spray them with blue Dylusions spray.  Then I sprayed Perfect Pearls Mist gold on them for some shimmer.  They were very blue-so I added some bronze distress stain and some Perfect Pearls powder and water (gold and silver).  Then I inked the edges so they would stand out.  I used 3 pop dot squares stacked on top of each other (2 times) to adhere them to the mirror.  

I air balloon is from Hampton Art.  I stamped it on dictionary paper then mounted it on black cardstock.  I sprayed silver Perfect Pearls Mist on it.  The gears in the corner are rub-ons from 7 Gypsies.


Here is the bottom of the frame.  The little light bulbs are actually burned out light bulbs from the microwave. The first time my husband changed the bulb, I said can I have that?  It's really cute!  It looks like he had to change it again, because when I found them there were 2! :)  So they are recycled!


Here is the original mirror-taped off-ready for a new look.


Here are my original supplies.


Here is the mirror painted white.  I did a second layer but you could still see the old color come through.  At first I wanted the mirror to be shabby chic and girly.  But I couldn't get an even white all the way around and I am a bit impatient.  I saw a Steampunk blog hop and I had my gears so I changed the theme of my mirror.  Then I painted it with the Gold Dabber by Ranger/Tim Holtz.  I took the top off and painted it with a paintbrush.  

So here is another picture of my mirror (and me!).  Thank you for stopping by!  Until next time my friends...like what you see! :)


Saturday, October 27, 2012

Memories from Way Back

Hello Everybody!

It's no secret that I love to scrap.  Generally, I scrap events and pictures within the last few years.  I have lots of pictures and time keeps moving forward so I don't ever run out of things to scrap.  LOL!  Which means that I don't usually go into my old boxes (and boxes) of photos from way back when.  (Though I probably need to but that's another post for another day.)

So at Another Freaking Scrappy Challenge the 1st challenge is to scrap about high school, or a high school reunion. Click here for the challenge.  With having a son, holidays, everyday life, my husband-I just hadn't even thought about scrapping about high school or anything as me as a kid.  The photos aren't as plentiful as they are now-and don't get me started on quality!  As I looked through the photos from high school wow-35mm just isn't 5, 10 or 12 megapixels is it?  :)

But the more I thought about this challenge, the more I wanted to do it.  We have to scrap about ourselves (which I do-just present me-not past tense me).

So enough of my talking! Here is my page.  Scroll on down, and I will tell you more!


This is me in the 11th grade.  I had a bunch of band pictures, but not of me.  That year I was the historian for the band, which meant I took pictures of everybody but not that many of me were taken.  So I was quite happy that I found this one.  Although I'm not smiling :( and this scowl probably was plastered to my face a lot-yay for teenage angst ;)


Here's my journaling square.  I did love this outfit.  I bought it at a store called Maurice's at the mall.  In marching band I played bells this year.


1993 was the year.  Written next to it is that this photo was "probably Sept or October page done 10.26.2012 by katy)  I do sign my pages-usually on the back though.  I had to have roasted in that sweater. Hopefully there was a cool breeze!  ;)


Supplies Used:
Background paper-K&Company
Cuttlebug embossing folder on blue scrap paper
Picture mat-white cardstock with Distress Stain and Perfect Pearl Mist
Washi/Tissue Tape-Tim Holtz, Reflections
Rose button-Bazzill
Tag-Tim Holtz
Green Letters-Thickers
Sticker Numbers-Colorbok
The 2 black lacey circles in the 2 corners are made using the Inkidinkado stamp system my hubby gave me for my birthday :):)

Thanks for stopping by!  And thank you Another Freaking Scrappy Challenge for a reflection I probably would not have made otherwise! :)  Until next time my friends...sometimes it's good to look at those 35mm pics from long ago! :)

Thursday, October 25, 2012

Witch Card

Hello Everybody!

I have another Halloween card to share.  I used some stamps I bought about a month ago from Great Impressions.  The witches are super cute!


I am submitting this card to the Great Impressions Blog Challenge: Fall.

Supplies used:

Sentiment, Main Image-Great Impressions stamps
Orange Embossing Powder-Zing
Twine-Maya Arts
Various scrap papers in my bin :)

Thanks for stopping by!  Until next time...have a good night! :)

Tuesday, October 23, 2012

Boo! Card

Hello Everybody!

I made this card using the sketch at Let's Scrap.  There's not much time left (I always do this!) but there will be a new sketch tomorrow.  :)

Here's the sketch right now:


Here's my card.  The trick or treaters are from My Minds Eye and the spider is from Jolee's.  The green spider web paper is from some bargain Halloween paper I bought from Target.  

And those cool eyes?  They are from Michael's.  This is the first time I have used them.  Spooky!  


Here's a close up of the trick or treaters.  


I am linking this card to the following challenges:

ABC Challenges: ABC1-New to You--The googly eyes from Michaels-I bought them a few weeks ago and this is the first time I have used them.

Unique Crafters Challenge: Halloween Themed Projects.

Until next time my friends..."always feels like somebody's watchin' me" (Rockwell)   :)

Little Round Pumpkin-Tidbit Tuesday

Hello Everybody!

Today's tidbit is about scraplifting.  I did this with this cute little pumpkin.  It's is sooo cute!  Here let me show you, and then I will tell you all about it!


I get the Weekly Scrapper email which is through the Scrapbook Expo folks.  It has products, trends, tips, and all sorts of other fun stuff.  I think I get an email daily.  So one of the emails is a tutorial on how to make this pumpkin.  There is an apple tutorial as well.  Go here to see the tutorial.  I didn't have the exact supplies, but I had the ink and paper to use that were the right colors.  The tutorial is easy to follow.  Amanda Corbet made the pumpkins and did the tutorial so I want to make sure she gets the credit.  :)

The leaves are different than what the original had.  I used a Sizzix die that had swirls and a little flower on it. (The flower will be for a different project.)  Then I used green Stickles on the swirls.  Both sides of the swirls since this is a 3-D project.  :)

The Halloween sentiment are 2 stickers from Authentique that I put on black cardstock.  One side is orange and the other is white lettering.


Here is a different angle of my pumpkin.  It's a 3-D thing.  I send my nephew a little Halloween goodie box, so I am going to put this in there for their card.  If I can depart with it!  LOL

I am going to link this up to Cut It Up: Eek! Boo! Ahh! Challenge #4.  The swirls are from Sizzix Flower and Vines #2.

I am also linking this to Unique Crafters Challenge: Halloween Themed Projects.

Thanks for stopping by!  Until next time my friends...have a bootiful evening! :)


Monday, October 22, 2012

A Jolly Halloween Card

Hello Everybody!

I hope you had a great weekend!  The air has gotten cooler and the humidity has gone down--it's fall in Florida! :)  I love this time of year!  Pumpkins, mums, and Halloween!

I am entering this Halloween card into the following challenges:

Simon Says Stamp Challenge: Eeerie Inspiration, Joy's Pinterest Inspiration Board


Digi Heaven: Happy Halloween Challenge (Thanks Mynnette for telling me about this!) :)

Here's my card.  The main image came from VintageFeedsacks which you can find here (for free). :)  I saw the jack o' lanterns in the inspiration picture and I remembered seeing this image in my blogger feed-I knew it was a perfect fit!


Other supplies include: orange cardstock embossed with a Tim Holtz fade, black cardstock, chevron paper from Hobby Lobby, and a grey/black ribbon.

Thank you for stopping by!  Until next time my friends...stay spooky! :)

Thursday, October 18, 2012

O Christmas Trees!

Hello Everybody!

I decided to switch gears and make a Christmas card using a sketch.  Here are the challenges:

Unscripted Sketches #180


Here's my card.  The green Christmas trees are from The Alley Way.  They are on their freebies page which is here.  


I'm not going to lie, I wanted to use red.  But I held back!  The card is cream and the paper with the writing is cream tissue paper with the printed writing.  I used a swirly Christmas tree from Stampendous to make the backgrounds for the green Christmas trees.  I embossed with gold embossing powder.  I used copics for the Christmas trees and a metallic gold marker.  I border punched a piece of brown Bazzill paper and tied a ribbon.  :)


Thanks for stopping by!  Until next time my friends...I am still working on Halloween!  :)

Friday, October 12, 2012

Another Cute Halloween Card

Hello Everybody!

I am back with another cute Halloween card! I used the sketch from  Unscripted Sketches Challenge: #179.

The pattern paper is from My Mind's Eye.  I did spray some Fresh Lime Dylusions spray on the middle paper.  It would be black and white otherwise but I was trying to go for the wow factor! :)


This cute little bat and sentiment are from The Alley Way Stamps.  They are free digis and you can get them here.  I embossed the circles. And I used Purple Stickles for the bats polka dot wings.


I used orange Dylusions spray for the sentiment.  


Do you ever love some cards more than others?  That is how I feel about this card.  I don't know if it is the bat or the colors, but I just love how it turned out.  Until next time my friends--don't go batty! ;)

Candy Corn Witch

Hello Everybody!

I made this card for this month's sketch challenge at Sparkle N Sprinkle.  They have a new home-so go check 'em out!

I am also linking this to For Fun Challenges: Fall.  I don't know about you but I love all the different kind of candy corn candies in the fall! :)

Here is this month's sketch:


I am in total Halloween mode so I used this cute Candy Corn Witch from Sparkle N Sprinkle.  She is available as a digi stamp or a rubber stamp.  She is designed by Michelle Perkett.  They have a couple of other little witches too.  I have her in the digi form, so I printed her out and colored her with Copic Markers. I also used pop dots to give her some dimension.

The spider webs are a Martha Stewart border bunch.  And the I put Halloween stickers on the bottom.


I love this background.  I used a shimmer clear from Smooch for the white.  The masked the middle using Dylusions orange spray, and then I masked the bottom layer for yellow Smooch.  Then I sprayed a little more clear onto the orange so it would sparkle.

I was all about candy corn as you see that that is what the triangle is made out of.


Here's a close up.  I was trying to capture sparkle but I don't know if I achieved it.  (I am kinda thinking I didn't!)

Thanks for stopping by!  Until next time my friends...it's candy corn time! :)

Saturday, October 6, 2012

Trick or Treaters

Hello Everybody!

This is my 2nd post today to show you a Halloween card I made featuring stickers.  It's for the challenge going on at For Fun Challenges: Let's Sticker Together.  For this challenge you must use stickers as the focal point.

These 3 stickers are from Me And My Big Ideas (Mambi).  I put them on white paper and then cut them out.  It keeps their colors vibrant (especially against the black paper).  The orange piece is like a velvety ribbon.  And even the sentiment is a sticker. :)  The kid in the chicken costume is adhered on by using pop dots.


Here is the inside.  This sentiment is a stamp but that little bat is a sticker from Cloud 9.


Until next time my friends...no tricks only treats :)

4 Squares

Hello Friends!

Happy World Card Making Day!  Such a fun and happy day!  I'm gonna start it off my showing you a card I made for The Game-Challenge #10 Four Squares.  I hadn't played this until my husband and I were at the park with our son.  It's lot's of fun.


I cut a piece of black card stock 4.5 inches wide by 9 inches long and folded it in half.  The smaller squares are 2X2 inches.  I made them from dictionary paper that I had sprayed Dylusions ink on.  I love this ink!  So bright and happy!  I used squeezed orange and a little bit of fresh lime for some contrast.  Around the edges of the squares I put on some orange Smooch.

The stamps are from Stampin' Up 2001.  I am still using still using these little guys!  And I used black embossing powder on them.


Here's the inside-a smaller white square for writing and a trick or treat ribbon across the bottom.


Thanks for stopping by!  Until next time my friends...let's make some cards! :)


Friday, September 28, 2012

Happy Birthday To Lessology!

Hello Everybody!

 I am super excited about this project I made for the challenge at Lessology! They turn 1 this month! Yay! Also, this is the very first challenge blog I participated in. A whole new world! 

Speaking of challenges, I am entering the gift bag into the following:

Lessology #18: It's a Wrap!

Recycle, Re-Purpose & Reuse: Anything Goes

Simon Says Stamp Challenge Blog: Anything Goes


Anyways let me show you the gift bag I made out of plastic bags.  This first picture is the gift bag with a tag made out of cardboard from a box.  And it's "dressed up" with the tissue paper.


Here's the bag not "dressed up."  It's made out of plastic grocery bags and Modge Podge.  Scroll down, and I'll show you what I did! :)


I used white plastic grocery bags.


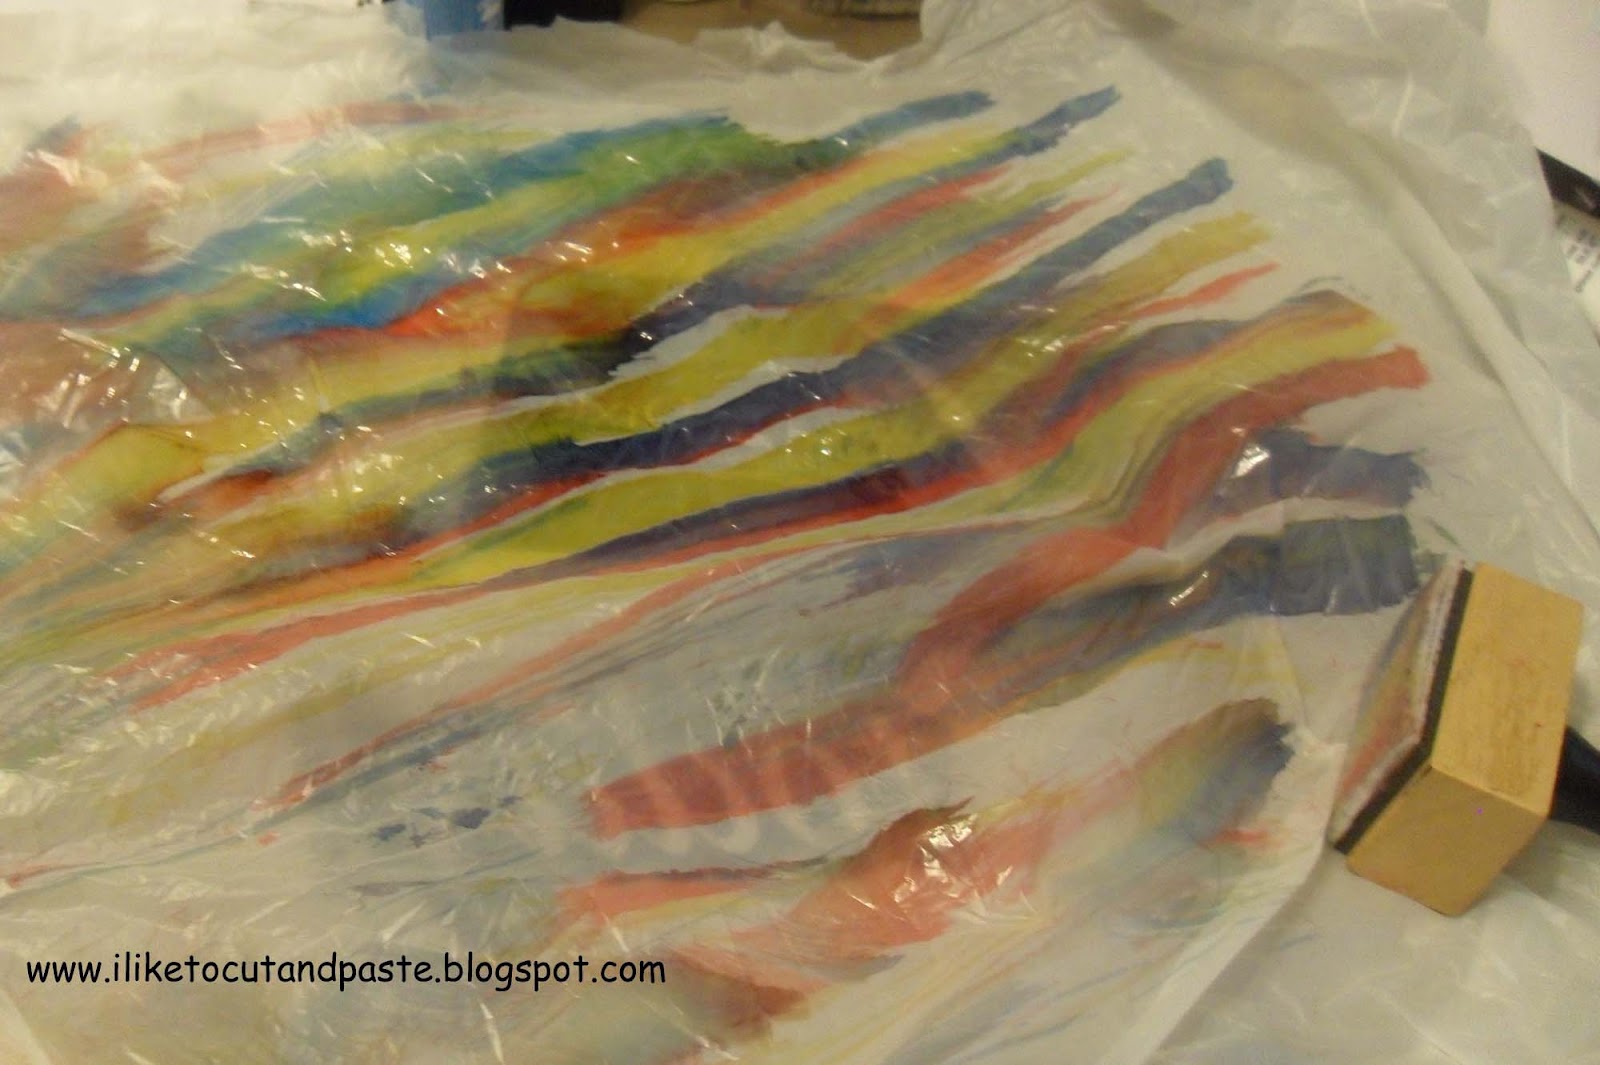
I colored them using Tim Holtz Alcohol Inks.  I used brights red, yellow, and blue.  I used the felt applicator to paint the bags (back of the bags actually, the front has the store name).


I cut strips out of the bag.  Initially, I wanted to weave it.  But that isn't as easy as it sounds.  So I had to go plan B.  I blew up a balloon and in a paper mache fashion glued the plastic strips to the balloon.  I probably did 4 or 5 layers.  Then I hemmed the top on my sewing machine.


I took the back of 3 bags and rolled each one.  Then I painted each one red, yellow, or blue and braided them.  I did this for each handle.


Here they are before I braided them.


My son held one end while I braided each handle. :) (hence the playdoh in the background)


And that's my repurposed plastic bag-gift bag :)  Until next time my friends...it's party time! :)