Hello Everybody!
October hasn't even started, and it is a busy month! There's Breast Cancer Awareness, Oktoberfest, Halloween, and I don't even know what else! Whew! Well I have held off going Halloween shopping until Oct. 1st. Then woohoo! Here I come :) So to start off my love for Halloween here is a card using the Tuesday Tidbit technique...
Here is my big o' mess of orange yarn. I have had this so long, I can't even remember where it came from, but I'm glad I have it for this project!
On Tuesday I used wet glue, but today I am going to use the red line sheet. It's tacky on both sides. Very tacky!
Using my 2 1/2 inch circle hole punch, I sort of cut a hole in the red line sheet. Scissors help me free my circle!
I peel off one side of covering so one side of adhesive is facing up.
I start my orange yarn piece.
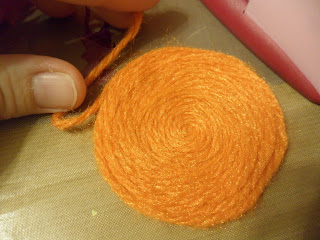
And I start the circle shape with my yarn.
Lookin' good. This can be somewhat challenging, trying to keep all sides even and your hand out of the glue!
It's almost done! Because there was more of the adhesive circle and the top, I took my yarn (without cutting) half way down, brought it back up halfway, came back across the circle and did one more circle with the yarn to complete it. (I hope that made sense!)
I tried to stick the end piece kind of back into the circle so it isn't hanging out loosely. All done...Now what?
Get out those black scraps! Time to make this jack o' lantern a face!
To make the stem I used raffia. We probably all have this at our houses! This is just green, and you seen how much I have! I cut off maybe an inch or so, and don't unravel it. We want to keep it wound up. Put it to the side.
Next I took black card stock measured to fit my card and adhered it to my card. Then I took a piece of Halloween ribbon and went up about a quarter or so from the bottom. The ribbons came from Hobby Lobby, part of their Paper Studio line. I adhere the piece of ribbon.
OK, so now I carefully remove the back of my pumpkin. Here is what the back side looks like. Pretty cool!
Now I put the raffia stem to the back of the circle, making sure some if it peaks from the top. This should be enough to keep the stem on because the next step is to put the whole pumpkin on the card.
I added a sentiment in the right space of the card to give it some balance. You could very easily just stick in the center of the card and do with the sentiment on the front. Let me know if you make one of these! Until next time my friends...enjoy Autumn!


No comments:
Post a Comment