Showing posts with label Metal Embellishments. Show all posts

Tuesday, April 13, 2021

Orchid Vignette Box

 Hello Friends!

I am so excited to share a cool vignette box that I made for a friend of mine. :)  My friends loves and takes care of orchids-so I had to make sure I incorporated that into this box. It was a thank you from me to her. Sometimes cards just aren't enough ;)

So here is the vignette box:


I made these orchids using a silhouette design store file and wilted violet and wild honey distress oxide inks. The leaves are from a tim holtz funky floral die cut set and I trimmed the leaves to look like this. I did a little paper shaping, also.  I used a botanical rub on on from tim holtz in the background.


This is an adornment metal charm from tim holtz. I made it purple with alcohol ink.  And the dreamer of dreams is another rub on from a different set. 


There's another picture of the orchids because I love how they turned out. They are in a little tim holtz jar (corked vials) and I glued the stem to the side of the jar to keep the orchids from moving around.


The background is a tim holtz wallpaper that I colored with vintage photo and broken china distress oxide. The bird is clay and made from a mod podge mold. I painted it with a finnabair sparks paint-butterfly spells.


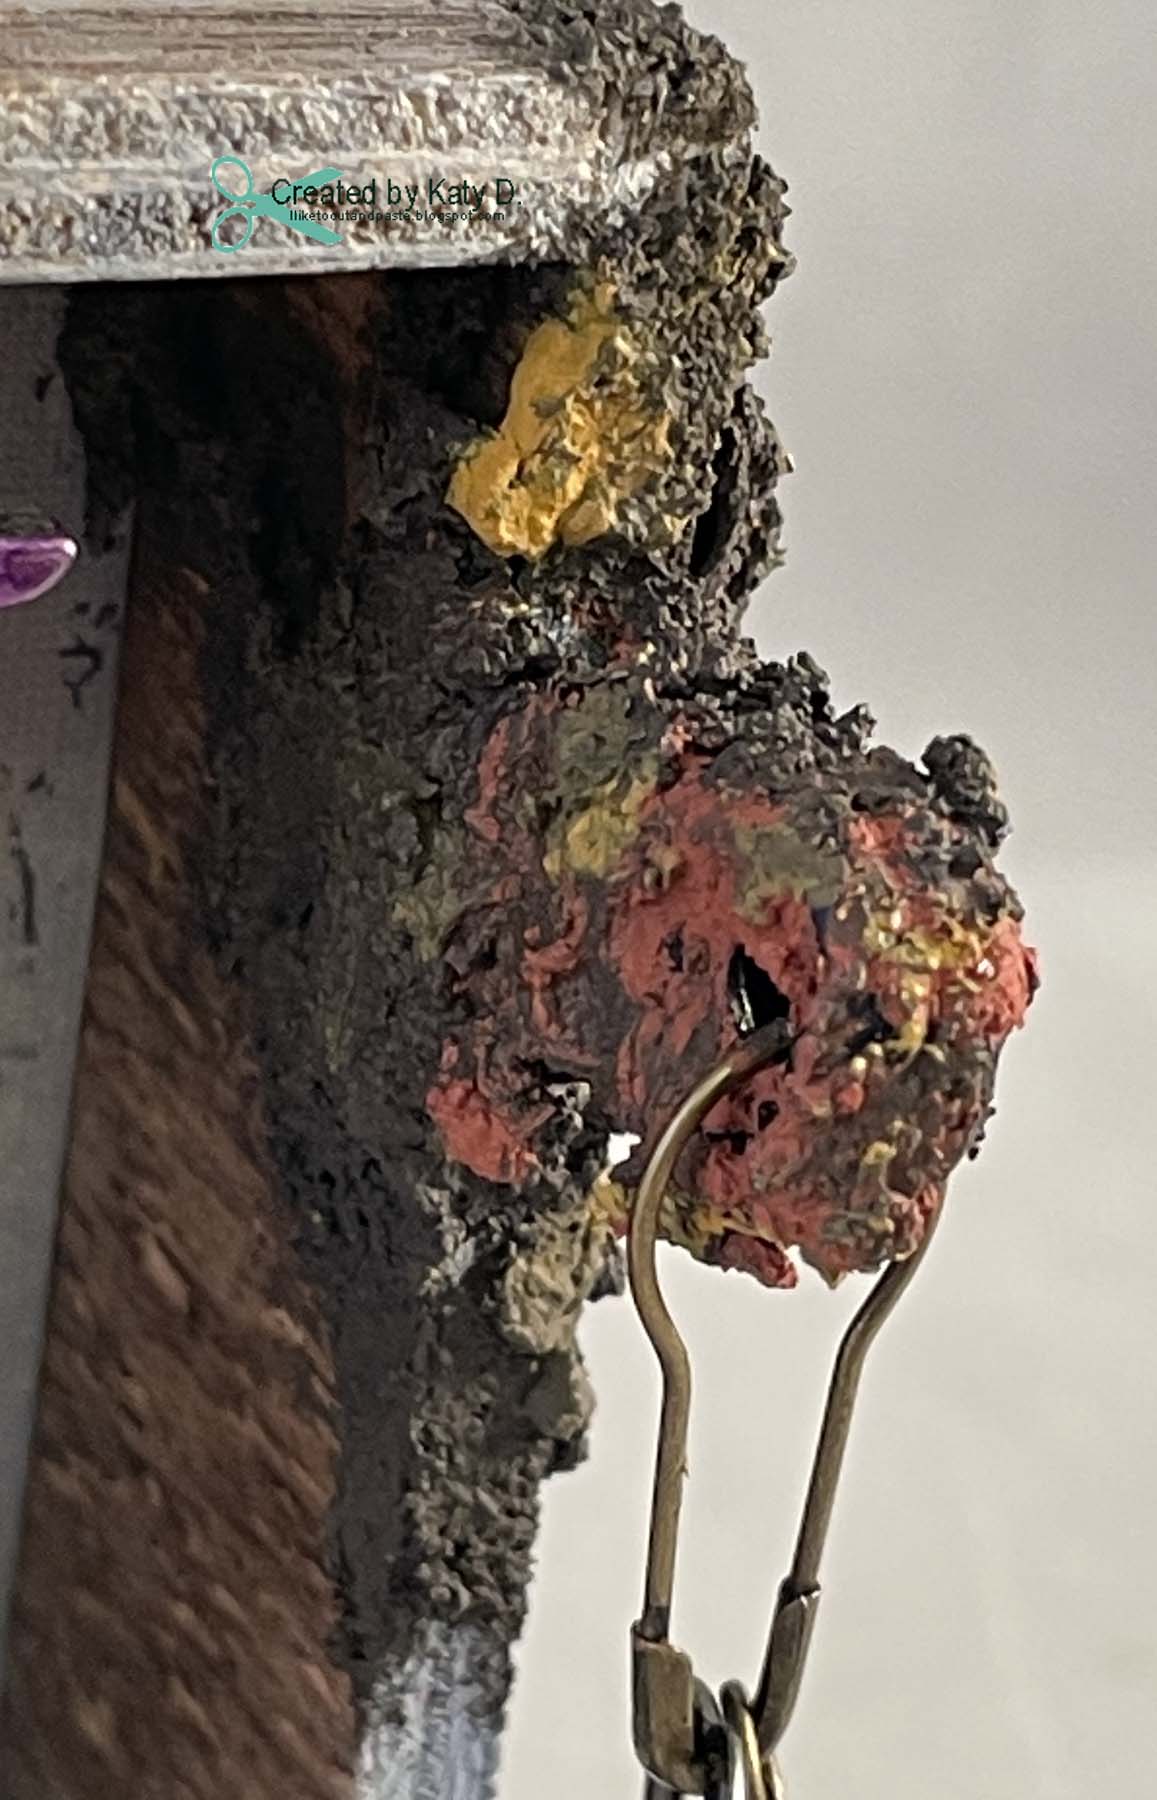
Rust! I love to create rust! I used finnabairs 3 paint/paste rust effects. This is over a clip thing that has a whole in it. Originally, it was an orange clip from Making Memories. Then I painted black gesso over it and clipped it to the side. I made the rust happen and used extra jump rings for the time coin and antique gem- both are tim holtz.


Here's a side view.  I sprayed stormy sky distress oxide spray onto the box so it has a blue tint.


Look at that rust!


Another view.  The paper doll is from tim holtz.


This is the 2nd smallest vignette box that Tim sells. I also added antique glass glitter from Melissa Francis along the corner on the left and the bottom.  I feel that I need more glitter in my life and used it here. :)


I am submitting this cool vignette box into the following challenges:

Path of Positivity Challenge: #90 Smile/Laugh This is a thank  you for my friend for helping me. I know she will smile when she sees the orchids. :)

Use Your Stuff: #420 Spring Easter

Thank you for stopping by! :)

Sunday, February 14, 2021

Happy Valentine's Day! 2 of 3

 Hello Friends!

Here is the last frame I made out of the six. It's for my nephew who likes Stem.


I gessoed the wooden frame first. And when I painted it with paint I could see areas that didn't get paint. So I left it like that-you can see the white peaking through. I feel like it adds personality to the frame. I used a Tim Holtz stencil for that computer board looking lines and Finnabair gold wax. Then I added clay stars and used vintage gold Finnabair wax on them. I glued little metal gears to the others side and a clay heart with wax on it. I stamped the atom and the carbons at the top using Close to My Heart stamps and Ranger Archival ink. Those stamps go with a chemistry stamp set-so cute! I got it a few years ago. 

Thank you for stopping by! I hope your day is awesome! :)


Sunday, May 15, 2016

Wild Winston

Hello Everybody!

I am so excited to share my latest project with ya'll!  It was totally inspired by the Creative Carte Blanche challenge.  The challenge is to use the 3 W's: Wood, Word, and Wild (an interpretive element).

I have wood panels that you can craft it.  That's what I used for the base of this project.  The wooden oval is about 7 inches tall and 5 inches across.  I put gesso on it to prime it.


I used Wendy Vecchi's crackle texture paste and Tim Holtz's stripes stencil for the middle texture.  The I used a mixture of Golden paints to create the background.


In this picture you can see that crackle and the gold paint.  I started with the brown color and mixed red and brown and added that on top.  Then I used the two different golds.  I love the shimmer!


Here is the finished project:  Wild Winston.  This fella was the Law back in the day.  They named him Wild Winston-but it was an ironic name.  He wasn't very wild.  He broke up gambling rings, sent trouble makers a packin' and recovered many a stolen horses and cows.  He was mild mannered.  And he was a man of God.  Good ol' Wintson was a brave soul--his job was to keep the town safe.  And that's just what he did.  :)


Here is Wild Winston-the bravest in all of that part of the West.  The picture, metal oval circle (sticker), and the frame and Brave are all from Tim Holtz.  The handcuff, cross, and key charms are from Pepperlonely LLC.  The frame is a small cabinet frame from TH.  It's my first time using it with a found relative photo.  The oval sticker fit perfectly.  I used an embossing pen to make the gold embossing around the frame.  That was my first time using the pen-it's awesome.  :)

I would like to submit Wild Winston into these challenges also:

STAMPlorations: Mixed Media Challenge: Anything Goes


Thank you for stopping by!  Until next time my friends...have a great day! :)

Tuesday, May 6, 2014

Sweetie Layout

Hello Everybody!

I am so excited today because I am the Guest DT at Stick It Down.

Here is my layout.  I love this background paper-it's from Reminence.  I found it looking for other paper and knew I must do something with it.


Here is the sketch:


Here is a close up of the title.  I used an acrylic prismatic word for the title (that's what the title called it).  They are a pack of letters from the Sweet Life line from Colorbok.  I bought them at Joann's.


Here's another picture because the light catches on it differently.  I used gesso underneath this so it would pop.


Here's my Thickers journaling frame.  Those little hearts are so sweet!


The arrows are from Unique Designs.  I didn't paint them or anything because their natural color is perfect here.  I used a keyhole (Tim Holtz) magnetic die on the white envelope and put red cardstock behind it.  The white cardstock behind the picture is also embossed.


Thursday, November 29, 2012

Epcot Layout

Hello Everybody!

Today I am linking a scrapbook page up to Another Freaking Scrapbook Challenge.  Here is the sketch:


Here is my interpretation of the sketch.  I don't know about anybody else-but I love how it turned out.  I used rub-ons (Art Warehouse), stamps (Sparkle N Sprinkle), and some metal arrows from Tim Holtz and Spare Parts (Hobby Lobby).  The gears are embossed with a Cuttlebug embossing folder.  The post card and background paper are from DCWV.  I even got to use a key! :)  The title Epcot is a laser die cut from a company called Laserline.  I had bought it at my LSS.  Oh and I used Tim Holtz chit chat words in the middle.


I love this group picture of us.  We had a lot of fun.

Thanks for stopping by!  Until next time my friends...have a good night :)

Thursday, April 12, 2012

Tag of Words

Hello Everybody!

If you are here to see my project for For Fun Challenges click here.  Otherwise- scroll on down and check out the the card I made with a different tag!

This project was inspired by 2 challenges.  At Frilly and Funkie the needed ingredient of this weeks challenge is Words.  Over at Simon Says Stamp and Show the needed ingredient for their challenge is a technique from Tim Holtz (also known as Lord Tim) :)  Thus this card was born...


Here's the inside.  Scroll down, and I'll show you some highlights.

The sentiment is from the computer and then I distressed it.  For the distressing I used rusty hinge, walnut stain, tattered rose, shabby shutters, and weathered wood.


Here is a close up of the tag.  I embossed a piece of blue Coredinations paper with one of Tim's embossing folders.  I rubbed walnut stain Distress ink over it.


On the main tag I used the resist technique.  I stamped this with versamark, used clear embossing powder, and heat embossed it-which I love doing-so magical!  I made the actual tag from the George cartridge on the Cricut.


Here is the finished heat embossing.


Then I took the 5 different Distress inks and put them on my mat.  I don't have a spray with water so I tried to used Tattered Angels.  It wasn't quite what I had in mind, but there was a glitter effect which was cool.  You can see the heat embossing through the ink which is so cool!


I just got my copy of Paper Crafts magazine and on page 37 Emily Branch made lace flowers for her beautiful card.  And I bought these Glubers a couple of months ago...


And I have lace...

Woo Hoo!  I LOVE this flower!  The pearl is from Making Memories.  Love. This. Flower.


So I have these stamps from Just Rite stamps from many many moons ago.  And they self ink and still work and I still love them.


So I stamped different words on a piece of white cardstock and distressed it with the same color inks I used for the tag.  I cut out words and that's when I realized I had extra words.  I put them on the inside.  I didn't plan on making an Anniversary card, but I am so glad that that is what I made.  Our anniversary is in a couple of weeks--and I'm prepared!  Or at least for the card part :)


Here's my card again.  The metal washer says destination.  The first word together is under a fragment so I like to think of this as Destination: Together.  I used my gold leaf pen to outline the outside of the card.  Oh!  And I put the words on a piece of kraft paper that I also distressed.  To balance out the tag I put the metal spiral opposite of my favorite flower.

I hope ya'll like this card as much as I do!  It was lots of fun to make!  Until next time my friends...get out your words and Tim Techniques--something fun awaits!  :)

Tuesday, March 6, 2012

Happy Halloween--2005

Hello Everybody!

Right now there is a use metal Challenge going on at Let's Scrap.  So I got out my Halloween stuff.  I have lots of metal embellishments there!

Here's the sketch....

This is the first time that I changed it up as much as I did.  I didn't have a CD or a tag to put on this layout.  So at first the witch was in that spot and then I moved her to the outside of the page because I thought it looked better there.

The paper-black is Recollections cardstock.  Orange polka dot--Making Memories  I don't know the green ooze brand but I got it at Michaels and had to use it.  I bought it a while back but it's so fun!


So here are some of my metal embellishments...


As I was looking at the witch, I thought about a door.  Well these are the only hinges I have and there are 3 different ones here in this package.  So I just used the smaller and midsize one together.  Sometimes you just have to make it up as you go along ;)


For the door I used my embossing stylus and a cutter and used the groove to make the embossed lines.  I used walnut Distress Inks to color the door and a brad for the door knob.  The door doesn't open.

For this page the bat (Tim Holtz) and the little trick or treat ghost are metal, too.


The swords are metal here and there is a metal bottle cap.  The key is Martha Stewart but I don't know if it's metal or plastic disguised and metal.  It was light in weight when I peeled it from the package.  Either way it still looks cool, and I'm glad I was able to use one!

Here's the close up of my journaling.


Close up of the swords and key.


This is the Karen Foster paper that my title was cut out of.  It was the perfect size!


Close up of my metal bottle cap--and so true!


Here's the whole layout.  Until next time my friends...have a ghoul night! ;)