Sunday, June 28, 2020

Mickey and Minnie Happy Birthday

Hello Friends!

Kellybell Designs is having a challenge this month that includes Mickey and/or Minnie Mouse, 4 pictures, stars, and a Mickey Head.  For the past two challenges I have created hybrid layouts.  I print out her digital files that I have and then I cut them out and arrange them.  But today I did a totally digital layout.

It's my first digital layout, and I submitted it to her monthly challenge.  


First, I just have to say that I love her elements.  I have about 6 sets and let me tell you I want more!  LOL!  I love this mickey background paper.  I have some printed out because it was my intention to do a hybrid.  I enjoy printing and cutting but my original pictures weren't going with these papers and these are what I wanted to use. So I scrapped this pictures.  I did this on a 8X8 so I could print it out.  The papers are 12 by 12 but I don't know how I would get it printed.  I guess have someone print it for me-but it just seems daunting.  LOL.  

The stars are around the pictures at the bottom.  And if the mickey heads on the top paper don't comply-then there is a mickey on the banner.  :)  I love her ribbons too.  LOL which is funny because I have lots of ribbon in real life that I never use.  I need to work on that!

Thank you for stopping by!  Until next time my friends! Air Hugs! :)

Saturday, June 13, 2020

Let It Shine Altered Paintbrush


Hello Everybody!

I have been making clay pieces with molds-and today I made a project with them!  This is going to be a present for my husband for Father's Day so shhh.  :) So let me show you what I made:


I started with this paintbrush from the dollar tree.


Then I gessoed the paintbrush and added gears for where I wanted them to go.


Then I went through and painted everything with black gesso.


I made a lightbulb using a Tim Holtz stamp, wild honey oxide, and rusty hinge crayon.  I used vintage gold, rusty brown, rusty red waxes on the gears.  And I painted the handle with the copper paint from the Patina effect paste-and then i painted a little of the rusty brown on it.  


I added black micro beads too.  I used a Tim Holtz paperdoll and a quote chip (which seriously are one of my new favorite things).  


I added Finnabair rust effects to the sides of the paintbrush.  


I used brown and red rusty waxes on the actual bristles of the brush.  The original bristles were bright compared with the rest of the projct.  I cut the chipboard quote and colored them with rusty red wax and vintage gold wax.

Here is a close up of the light bulb.


Here is the paintbrush altogether.  My idea was that the gear "machine" makes the lightbulb work thus lighting the way.  My husband lights the way for our family :)


I am submitting this to the following challenges:


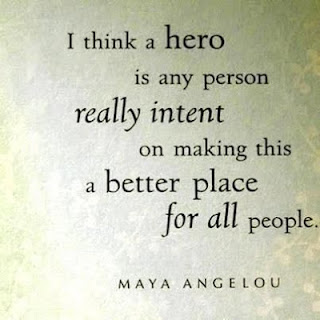
{Pin}spirational --#264 photo inpiration: My husband is definitely a hero in my eyes.  He takes care of us and makes sure we have everything we need.  He works hard at his job and at home.  He is an awesome dad too! He definitely makes this world a better place. :)


Thank you for stopping by today! 


Tuesday, June 9, 2020

Today is Full of Possibilities-Mixed Media Canvas

Hello Everybody!

Do you ever have one of those projects that you just start and little by little you add stuff but don't finish it?  I do or did :)  

Here is the finished project-it's a mixed media canvas I did.  I had started it.  Added this or that and put it to the side.  I knew what color I wanted to make it but maybe I was scared?  LOL I don't know until I saw the challenge at The Funkie Junkie Boutique-Tickle Pink-using pink in a vintage or shabby chic project.  And then-I knew this was destined to be pink, which was floating in my head but I just wasn't ready for a commitment yet.


So this canvas started a while ago when I had received some lace and ribbon from a friend.  I have lots of ribbon, but I thought how can I incorporate this into mixed media?  So with mod podge for fabric (which I believe is a wonderful adhesive for fabric) I created this and covered it with gesso.  I also added crackle paint.  I had no idea what what going to be the theme except maybe shabby chic.  


So then I got into making clay molds.  And I thought this would be a good place for some of them.  So the 3 stars and the flower a the bottom (on top of a metal filigree) are Finnabair and the row of flowers is a mold from Mod Podge.  Then I glued some little wood pieces and buttons. 


Then it was time to paint or spray the canvas.  I thought I had pink distress oxide spray.  Surprise! I don't.  First I tried to make my own.  LOL-this is why I don't make paints or sprays or any of those things-because I am not good at them.  I took a small bottle of water and added spun sugar distress re-inker and it was so light.  Then I added worn lipstick to the bottle which was better-but not really. So then  I took Festive Berries oxide spray, white distress stain, water, and Dylusions white spray and sprayed until I could get the festive berries light enough to make pink. :)


So here are going to be closeups.  I added this string of hearts to the cluster of ribbons.


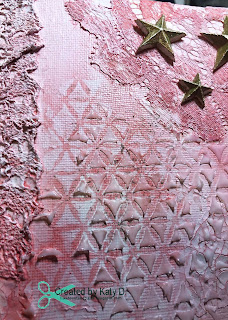
I used clear Wedny Vecchi embossing paste to give some dimension behind the the ladies but when I pull up the stencil some of the paste came with it.  But it pulled up some of the spray and I thought that was cool.


These clay hearts are painted with Sparks paint by Finnabair.  Can I tell you how much I absolutely love this paint-it's called Unicorn Hair.  Fun name beautiful color! 


Here is a closeup of the buttons.  I used heather hills and sweet rose Finnabair waxes on the feather and sewing bodice.

These bottom flowers are made with clay and a Mod Podge mold.  Then I painted them.  Let me show you with what in the next picture.


This is close to my heart paint which I have had forever.  It's a bit iridescent.  It mixes with reinkers and the spray without getting weird. And that's how I painted those flowers.


Then I knew I needed a little more.  I stamped a couple of times in the background with weathered wood and stamps from Stamper Anonymous.  I added these fun paper flowers from Prima that you paint.  I painted them with Spun Sugar distress paint.  I added little pearls.  The really small flowers are from the paper studio (hobby lobby). And the sentiment is a theories quote chip from tim holtz.  I am really starting to love these.


Here are my ladies with the background behind them.  I colored their dresses with spectrum markers. This is one of my favorite Tim Holtz paperdolls because I think their are smiling and happy.  LOL. 


Here is my canvas all done. It's a 8X10 canvas.  


I am also entering this into:


Thank you for stopping by today!  :)


Sunday, June 7, 2020

Stars Tag

Hello Everybody!

Yesterday I was lucky to watch the Tim Holtz Saturday Demo--Live! Yay! :)  I have watched most of them in replay-and I learn so much.  I have been using distress ink for a loooooonnnnggggg time and I am in awe of Tim's creativity to launch new products with different effects.  So cool.

So yesterday was about distress crayons-which I have and just use one way.  LOL-I needed the help.  So check out my tag:


Here's how I made it:

I gessoed the tag.  Added modeling paste through a Tim Holtz star stencil. Then I watercolored each star using fossilized amber crayon first and then tarnished brass crayon.  The tarnished brass adds a little shimmer 😍


Then I sprayed it with distress oxide spray-wild honey, stormy sky, and dusty concord.


Ok check this out-- See the area around the stars-I drew little arrows to help.  That is the crayon resisting the spray.  I know!  I can't even wrap my mind around it.  The stars resisted too but not as much as I thought-hmmm maybe because I didn't put gesso on them?  No matter-I LOVE the way this background turned out.


The magic of distress crayons is collage medium-which I do not have.  So I stamped this stampabilites stamp on cardstock with jet black archvial ink. Then I covered it with clear gesso.  Then I drew a line with the different crayons and put water on my finger to move the color around. Then I added tarnished brass crayon for that sparkle.


My moon is a paper clay moon that I made using a Finnabair mold. I painted it with wild honey distress oxide stain but it was too bright.  So with rusty hinge and walnut stain I toned it down and grunged it out a bit.  Then added tarnished brass crayon with water to give it that shimmer.  Shimmer for the win!


And here is my tag all put together.  I used dusty concord oxide stain for the ribbon.  (It's old when Tim sold dyable ribbon.  Told you I have been collecting I mean crafting for awhile!) LOL


Here's a close up.  I used foam adhesive for the sentiment.  And added wings to a Tim Holtz paperdoll.  


Thank you for stopping by!  I am entering this into the following challenges:


Friday, June 5, 2020

Lucky to Know You Canvas

Hello Everybody!

I made this little canvas which is about 4 X 4.  I used modeling paste and then a flurry of sparks paints and micro beads and some finnabair waxes.  First you have to see what it is made from!


The base is this ten flat foam piece which is actually for teachers to teach kids.  I found a few sets of this with other counting things at Goodwill.  WooHoo!


So I painted it with black gesso which it took well.  Then stenciled over it with modeling paste.  I originally wanted it to be red.


And gold LOL


But that wasn't working for me.  So I coated the whole thing with Finnabair gesso to start over.


Then without a real plan I glue on some sandy bits-sort of like mircobeads from Powertex.


I gessoed over that.


And then I started painting and stamping and whatever else and couldn't stop.  Until I did stop and didn't take pictures of that process.  LOL.  I added some silver Finnabair wax and then I painted over it with Golden paints.  That's what gives it a metallic look.  Then I added black over the beads and then used a green wax to highlight the sand beads.  I stamped the sentiment from Muse stamps.  I added the bird which also has a green wax from Finnabair.  The bird is made of clay and the mold is from mod podge.  Then I added some Tim H. paperdolls and the gem heart button, key and clock.


Close Up.


Close Up.


I am entering this canvas into the following challenges:


Thank you for stopping by!  Until next time my friends-I am lucky that you stopped by :)

**Edited-this earned a top 3 at the Crafter's Castle.  Thank you! :)


Monday, June 1, 2020

Pastel Rainbow Challenge and DT Call

Hello Everybody!

I hope you had a great weekend! Did you watch the rocket launch?  Pretty exciting! 

Today is the first day of a new month-and do you know what that means?  A new challenge at the Rainbow Card Challenge!  Woo Hoo!

It's so cool-it's pastel rainbow.  Here my card:


I used pattern paper from Paige Evans Horizon for the background.  Then I added flowers with brads-I am going to try to use more brads-that's my goal for June LOL.  And a couple of rhinestones for sparkle.

Also--are you looking to join a fun design team? We are having a design team call.  For all of the details go here.  We would love to have you! :)


Thank you for stopping by!  Until next time my friends! :)