Tuesday, September 30, 2014

Happy New Baby

Hello Everybody!

Since there are 5 Tuesdays in September-we do a special thing at Stick It Down Blog.  You can use any of the sketches and link up with us!

I am usually on the Single Page Team but I need to get a few cards made and sent out!  So I made a baby card for a friend of mine who just had a boy.  (I am so excited for them and their newest member!)  Babies are so awesome! :)

Here is my card.  I used my Cricut to make the feet on the circle.  Then the bigger blue circle is a punch that I have.  Then I gave those feet some Stickles Glittery Goodness.  The teddy bear is a button.  And the sentiment is from a Stampin' Up set that my very sweet and generous friend gave me. :)


Here is a closeup.  I used a little safety pin too.  :)


Here is the Stick It Down sketch.  You can do this one or go to the blog for lots of options- for cards or scrapbook layouts-or both! :)


Thank you so much for stopping by!  Until next time my friends...have a great day! :)

Saturday, September 27, 2014

Mmmmmmm Memories Layout

Hello Everybody!
 
It's my turn over at the Unique Laser Designs Blog.  Today I am sharing a layout I made using their awesome wood embellishments.  :)


For the title I used Mmmmmm and Memories with Emerald embossing powder from Sparkle N Sprinkle.  There are more words to choose from too.  Go here and you can see the different fonts and sizes! I used the triangles for the banner and I used regular yellow acrylic craft paint on those.  There is also an arrow that I used that I painted yellow.  That came from a package of  Kenny's Scrap.


 Here is a look at my page before pictures.  I had a little mister of water and shimmer.  I added 3 drops of Stampin' Up Glorious Green Re-inker to it.  It created this minty color which matched perfect with my embossing powder.  I added some light modeling paste and some random stamps to the background.


Here is a closeup of the banner.  I made yellow dots my diluting a little yellow paint and flicking it on the page (before I put on the pics and embellies.) :)


Here's a close up of the title.


Here is a close up of a little metal Tim Holtz tag in the middle.  I used words from one of his rub-on sets.  


Thank you for stopping by today!  For more inspiration for Unique Laser Designs check out our Pinterest Boards and our Facebook Page! :)  Until next time my friends....mmmmm cupcake.


Friday, September 26, 2014

Favorite Things Friday

Hello Everybody!

Today is Friday so that means it is time for our Favorite Things at Scrap It Girl!  This week we celebrate your favorite layout.  This was soooo hard for me--most of the time I love them all.  I didn't go way way back (like the pages that I haven't taken pictures of) but I found this one.


There are a lot of great components to this page.  One component is the picture-I love having pictures with characters-or statues of characters as in this case. :)  Then the paper background was already distressed (I think Daisy D maybe).  Then I stamped, used light modeling paste and washi tape and layered.  Yeah!  And the title is clever (I think!)

Do you have a favorite layout-or can you pick of your many?  I hope you do we would love to see it!  Link up here! :)

Until next time my friends....let's get to scrappin'!

Monday, September 22, 2014

Die Versions + Great Impressions: A Blog Hop!


Welcome to the Die Versions + Great Impressions designer's blog hop!  We've got both talented teams hopping today with a chance to win prizes from both of these craft suppliers!  Our theme for this hop is "Tis the Season" so get ready to see some beautiful holiday creations!  

You have have arrived here from Emilia van den Heuvel's blog.  If you haven't and would like to hop with us, please go back to the Die Versions blog to see the entire hop list and to start at the beginning for the maximum chances to win!

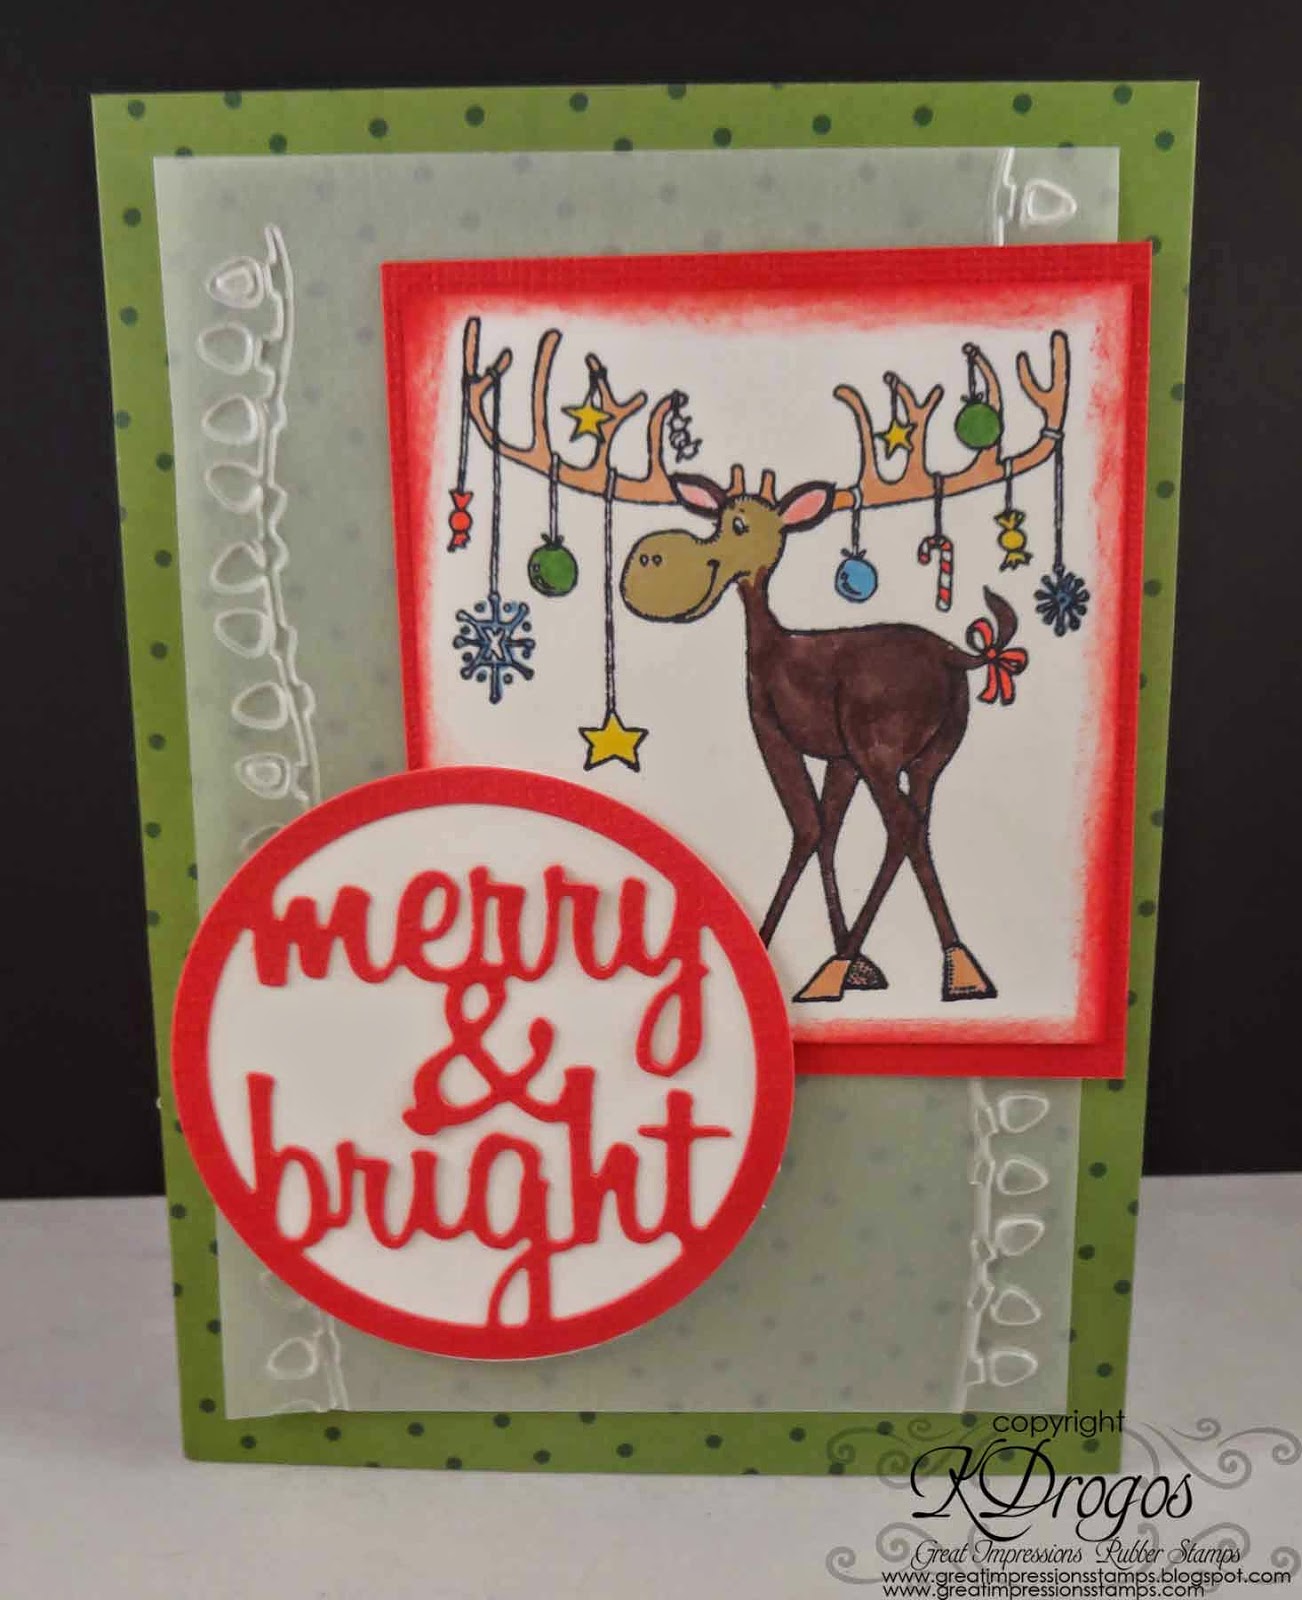
Here is the first card that I made with Great Impressions Stamp: H236 Merry Kiss Moose and Die-Versions Sweet Spot Die Cut: DVSS-012 Merry and Bright.  


For my second card I used Die-Versions DVW-400 Whispers Santa's Reindeers and Great Impressions Stamp G487 Homes.  Using my Homes Stamp, I stamped it twice with Versamark and then used silver embossing powder.  I cut out each set of houses.  For three of the houses I used pop dots to give a little dimension.  I used pop dots for Santa too.  Santa and his reindeer are cut out of black cardstock.  Then with a little water and Perfect Pearls I painted the Santa and his reindeer so they would have a nice shimmer.


Thanks for stopping by today!  Your next stop in the hop is Irit Shalom's blog!  We hope you're inspired all along the way!  Grab all the goodies used from the Great Impressions and Die Versions stores!  

Until next time my friends...be inspired! :)

An Autumn Color Challenge

Hello Everybody!

This week at House of Cards we are showcasing Cute and Fun cards using this month's challenge prompt.

Here is my card.


This month the inspiration is a color/picture challenge.  I don't have any apple things-so I used the colors! 

A couple things about my card.  I used Pumpkin Pie Craft re-inker to mix with the light modeling paste.  I used that mixture with my stencil to make the circles in the background.  The leaves are stamps from Autumn Leaves (a friend gave them to me-Thank you!) and I used Baroque Burgandy, Certainly Celery, and Pumpkin Pie inks for the leaves.  I used the Stampin' Up matching markers and a water brush to color the leaves in with a watercolor type technique.  The brown splotches are from the Tim Holtz spray thing and a brown marker.


I hope that you are inspired also will link up to our challenge!  

Until next time friends...it's time for all things apples and pumpkin! ;)

Friday, September 19, 2014

Great Impressions Friday Fun-Spooky!

Hello Everybody!

Today it is my turn at the Great Impressions Blog to show you all a Halloween card using awesome Halloween stamps from the very awesome Great Impressions Online Store!  :)

I love this house!  It is stamp F561 Haunted House and the greeting is A134 Halloween Greetings.


I used an embossing folder by Tim Holtz on the paper strips behind the house.  The paper I used is from Core'dinations.  It has an orange core and it is black on top.  The gems are from Mon Ami Gabby.  And the 31 is from a Tim Holtz mover and shaker die cut.  The papers are from DCWV.

Thank you for stopping by!  If you are making Halloween cards be sure to link up to the Great Impressions Challenge-Get Your Spook On.  And be sure to check out our Facebook Page and our Pinterest Boards.  

Until next time my friends...Happy Spooking! ;)

Thursday, September 18, 2014

A Steampunked Window

Hello Everybody!

It is my turn over at the Unique Laser Designs Blog.  And this is one of my most favorite projects I have ever made.  I hope I haven't creatively peaked!  LOL!  I am going to show you all the highlights.  If you are looking for how I did it-go over to the Unique Laser Designs Blog here, and I have a breakdown of steps.

I found this window box at a thrift store.  Never mind the thing in the window box part.  That is a project for another day.  And can you believe this in the only original photo I have of the box?  I apologize for the quality-it was a phone picture.  :)


So with some paint, fiber paste, aluminum foil, cardstock, acrylic sheets, alcohol inks, and Unique Laser Designs embellishments, I made this:


At first I wanted to paint this yellow and put on some cute ULD daisies.  But then something stirred--something Steampunk!  So I started to paint light brown.  Then I painted dark brown on it.  I sponged black on the brown paint.  I mixed black paint with fiber paste to create "gunk."

I didn't know how I was going to do the middle of the window until I happen to see my January Tim Holtz tag hanging up.  You can see it here.  And that is when it hit me!  I would do a section of exposed gears.  So I did-nice clean shiny gears inside the oily dirty machine. ;)


I used Tim Holtz's die cut bottles to make these bottles out of Clear Scraps which is a thick (but not to thick) acrylic.  I used alcohol inks and then I used the skull and crossbones from the pirate flag for one bottle.  For the other bottle I used the word hope from the brick stencil.


Because these gears are going in the "heart of the machine" I wanted a bright metal color.  The one on the right is embossed while the 2 on the left are "gold leafed" except with copper leafing.


Here is another picture of the window box.  I am going to put cards in it that are ready to go!


For my Unique Laser Design Pieces, I used the following:


I would like to enter this Steampunk Window Box into the following challenges:


SanDee & Amelie's Steampunk Challenges: "Steampunk Stories"--When I saw what September's challenge was-I was instantly intrigued.  How could I tell a story.  As I worked on my Steampunk Window Box there was a story unfolding.  I like to think of the window box as a dirty working machine just chugging away.  There are bottles in the window and one of them is labeled hope.  Is that bottle full or empty?  Then the heart of the box explodes-revealing a very clean "gear" heart.  There is a hot air balloon in the window-is it leaving because the people on there know the secret?  

Simon Says Stamp Monday Challenge:  Rock the Techniques:  I used Tim's pounce technique to apply the alcohol inks to the acrylic and foil.  Also, I used sticky powder on the gears with the copper leafing.