Last Tuesday I showed how lace paper could make a could textured effect when painted over. You can also use die-cuts from machines (Cricut, Slice, etc.) or cut out shapes from scissors or punches.
But you can also create a free hand 3-D texture with Puff Paint.
Below my textured heart I "puff" out Love and a heart (haha!) This is still on the inside of the cover page of a composition book. I allowed it to dry for over 24 hours. (It may be shorter, check mfg directions, I'm a better safe than sorry person!)
Then I get my paint brush ready!
I paint Love over with the same Acrylic paint as I used for the paper lace. I mix white in (not shown) so I can match the lighter pink color. Ideally, you would want to paint everything at the same time, so your coloring will match to your liking.
Let this dry for over 24 hours. And it's all done. I've seen this done on paper and chipboard, also. Keep scrolling because I did a variation of this on chipboard...
This is a chipboard B--all plain and boring.
Love these kinds of letters because you get 2 choices. (at least in the beginning ;) So I am going to decorate the block of B.
This is my experiment. Instead of using the Puff Paint, I decided to use Ranger's Enamel Accents, which does a raised paint line as well. It comes in white and black.
I did polka dots on the B block. You can make lines, swirls, even outline stamps!
This is my B block finished with polka dots. I like it like that...sort of a kraft look, but this is about creating texture and paint! Even though texture has been created....Anyways, let this dry for a good 24 hours.
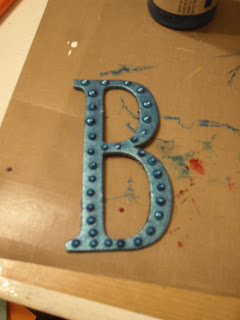
I start painting it with a shiny blue acrylic paint. Sometimes it seems as though the enamel polka dots are resisting the paint...hmm...
There's my Walgreens bag that I used as a place to paint my B block. I'll let it dry and then paint another coat on it.
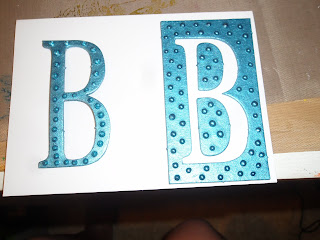
One difference I found--and this could be a patience issue--is that the enamel accents had a nice even top to the dot, whereas, the puffy paint had more of a peak.
After applying another coat to the outside B, it looks like the polka dots are painted. But if you wanted to wipe them off for a blue and black look--you can! (While the paint is still wet of course!)
Here are the B's side by side with the flash.
Here they are without the flash. You can see the peaks on the left versus a more uniform roundness on the right. Now I have these finished embellishments for a project! Until next time....


No comments:
Post a Comment