Thursday, September 16, 2021

Beware Vignette Box

 Hello Friends!

I made this creepy vignette box, and I am so excited to share it with you!  

This is the largest of the Tim Holtz Vignette Boxes. And this is a box topper that was sold in 2018. (Thankful for YouTube because I couldn't remember when I bought the covers.) After I decorated the inside I glued the panels down with collage medium.


From the top: I made this candles using Tim's directions from last year. And I painted them black. The skull is Ideology a few years ago. That is cheese cloth that I sprayed with black soot distress stain, hickory smoke oxide spray, and empty tomb mica spray. In between the candles and skull I added Tim's midnight mica flakes. Originally, I was thinking mirco beads and then I was like I have something cooler than that! :)


This is a Tim Holtz ghost die cut that I inked with a little peeled paint around the edges.


The background paper is from Tim's Region Beyond paper pack. I stamped bats on the this side of it. But the bats are actually from one of Tim's embossing folder. I used a Simon Hurley Stamp block-heated it and then took the impression of the embossing folder. So Cool!


On the inside sides of the box I applied Crypt grit paste. On this side is a die cut spider (the one from just the web and spider-Tim Holtz). I used some stickles to try to make it stand out a little. So it's just kind of creeping around back there LOL.


Here is the other side with the crypt paste.


These flowers are from Funky Nature. I used some black soot distress ink on the yellow blooms to make them less bright and more spooky. The Paper Doll's dress is from a spiced marmalade distress crayon and a little water.  The candle die cut is from Tim's Frightful Things. 

There is also a Halloween Quote Chip and 2 hardware heads. The rust is from Finnabair. 
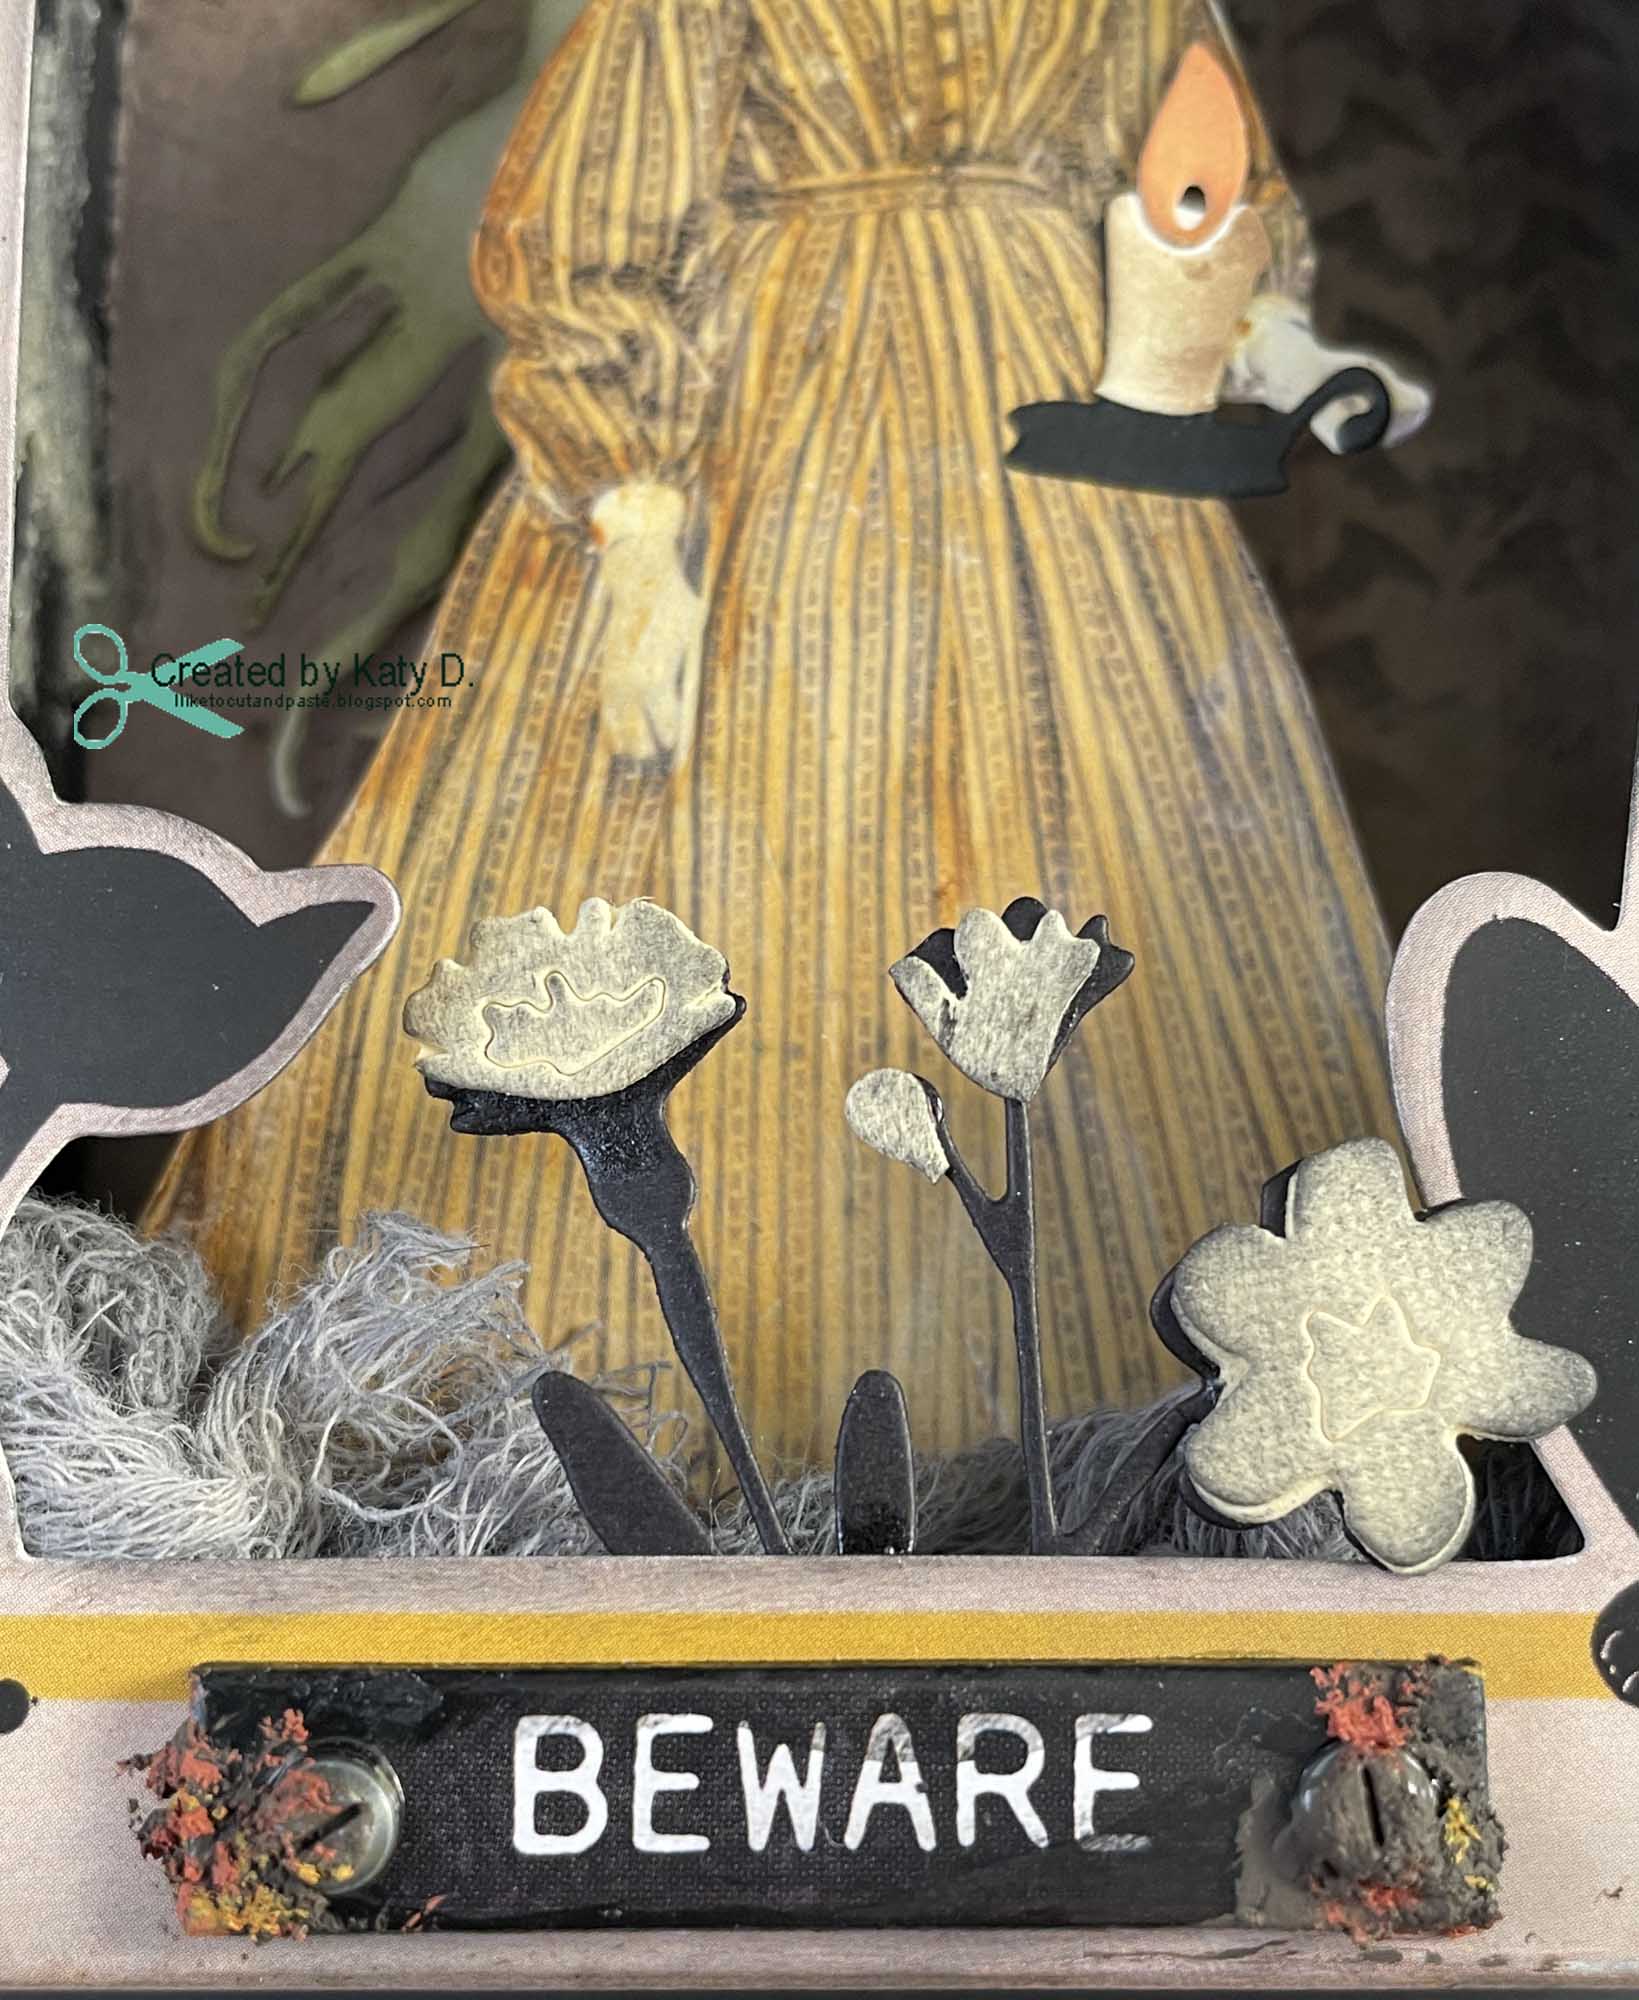

So this is cool.  Here is the finished box.


If you look you can see the paper doll's shadow. This is cool because it's like the candle is really working to create a shadow behind her. Eek! 


I am submitting this into the following challenge: 

TFJB Challenge: Creating Die-Na-Mite-use dies--Spider, Ghost, candlestick, and flowers

Thank you for stopping by today! :)


Sunday, September 5, 2021

Happy Birthday Card

 Hello Friends!

Hope all is well with you! :) I bought this Rupert Die Cut by Tim Holtz a little while back. I have made 3 Ruperts and this is the first one on a project. Yay! :) 

It's for my nephew whose favorite color is blue.


I used a circuits embossing folder for the white panel (tim holtz). I saw a Rupert on Pinterest and the person used that folder and it reminded me that I had it. LOL. This is the pin here.  The balloons are a die also from Tim Holtz. And then of course Rupert. Everything else the twine and paper were from my stash.

I am entering this in the following challenge:


Thanks for stopping by! 


Wednesday, September 1, 2021

Purely Plum

Hello Everybody!

New Month New Challenge:


Over at the Rainbow Card Challenge, Plum is the new color challenge.  I used Tim Holtz Purple Twilight alcohol ink, gold alloy, and blending solution for the background of this card. And I used the air pump tool thing that Tim has.  :) The blending solution helps to lighten the alcohol ink.


Then with gold foil paper from DCWV I cut out the frame/emboss from Tim Holtz and Sizzix. The heart and letters are also from the gold foil paper but the heart is the inside of a heart die cut from Simon Says Stamp and the letters are from a Tim Holtz alpha tiny type.  Then I backed the card with black cardstock. 

Please stop by the Rainbow Card Challenge to see what my teammates have created. There will be lots of inspiration! :)

Thanks for stopping by! :)


Wednesday, August 4, 2021

No Bull Birthday Card

 Hello Friends!

Here is a birthday card that I made for a dear friend of mine who likes cows :) I love making her cow cards to so it totally works! 

I didn't know what I was going to make at first. I went through the silhouette design store, and then I came across a print and cut farm file from Lettering Delights called Stickies Farm-the print and cut version. So I printed the bull and my silhouette cut him out-which was perfect because he has skinny little legs. 

The background is a combination of distress and distress oxide inks from Tim Holtz. This is on watercolor paper. The sentiment is from the upper case tiny typeTim Holtz letters by sizzix. I used Tim's metallic paper.

The sun is cut from my silhouette and I used stickles for sparkle. The grass is Lawn Fawn (die) and the flowers and leafy stems are from the Rubbernecker Stamps. Which I think this is the first maybe second time I have used these die cuts so this makes my heart very happy that I was able to incorporate them.


I usually leave the inside blank so I can write my message-but with the sentiment the way it was I had to stamp a birthday greeting! This is from sizzix. 


This card turned out so cute! I am excited to link it to the following challenges:


Thank you for stopping by! 


Sunday, August 1, 2021

It's August!

 Hello Friends!

Why is it that when one month ends it's so surprising? I guess it's because time just goes by so fast. And here we are-August!  

With a new month means a new challenge at the Rainbow Challenge! This month we are all about Teal!


Here's my card.  I used mostly Tim Holtz products. The die cut is from his Sizzix line-Cathedral Window.  I added crackle paint to the window and then used some mermaid lagoon distress crayon over the cracks and non cracked areas.

I used alcohol inks on on acetate and glued it to the window.  The flower is Tim's glitter alcohol paper (it's beautiful by itself) and I added the matching alcohol ink to it and put a rhinestone in the middle. 


For the background I used a Ranger stencil by Dina Wakley for the bricks and light modeling paste. When that dried I used mermaid lagoon crayon, tumbled glass distress ink and broken china oxide ink with water to create the drips and splatters.  I thought about a sentiment-but I felt like it would take away from the window. I write in the card anyways-so there will be sentiments inside :)

Here's what I used to make this card (minus the cathedral window die cut).


Be sure to check out what the teammates created-there is so much inspiration! 

Monday, July 19, 2021

A Birthday Vignette Box

 Hello Friends!

It was my husband's birthday and I wanted to make him something special. Combine that with my love of making vignette boxes-and a special gift was made :)

This is the second biggest vignette box in the set of 4 when you buy them. I also added the wood frame that are sold separately. So here is the box.


Then here is the box with tiny lights! I love tiny lights. Tim suggested a Fiskars hand drill to help put the lights through-and my husband bought me one.  It is very handy and not intimidating.  I don't usually use drills and stuff so for me this hand held drill is really nice.


Then here is the vignette box with tiny lights in a dark room. LOL. Those lights are just magical!


Starting here I love this because this is a little fish tank made with:
Red Foil paper and the smaller fish from Under the Sea die
Dimensional dome and the circle to cut it from Tiny Snowglobes dies
Baubles painted with Aqua and Sail Boat Blue Ranger Alcohol Inks
Googly Eye

The baubles look like real bubbles with the tiny lights on. And there is no filter! :) 


This Tim Holtz decorative dome has little bead dice from my stash. I glued them together using collage medium. Some how some magic happened here too and the dice look like they defy gravity. lol


These chess pieces are plastic and I used pitch black and gold alloy to dress it up a bit. This is the king piece :)


This is a Tim Holtz base that I bought for this project. I thought it would be fun to take the Vignette Box a step further. The package comes with two different sizes-this is the larger size. I used gold gilded alloy in the recesses and black on the embossed. 


Here is one side of the vignette box. First I painted the whole box and frame with black gesso. Then I painted collage medium over it. Then I tried to use some grit and crackle paste but I'm not good at that yet. I don't know how to get it mixed because I tried mixing it with paint. So I painted over it with brown and black paint. Then I got out my Finnabair Rust paint effects and created the rust. I left the crackle. The I went over the black it Finnabair vintage gold wax. That's what makes the frame dots on the front gold also.


Here is the other side of the box.


Top of the box. That little record player is from Hobby Lobby a long while ago. I love minatures but I don't need another hobby. So when they are on sale and I think I can use them-I will buy them. But I really have to think if I can use it and not buy it just because it's cute LOL. (The struggle is real.)


The sweet lightbulb is from Prima many years ago.

Metal gears in my stash (could be Tim's).


The pen nub and pen chipboard are both Tim's. The background paper is 7 Gypsies. I used a bit of walnut ink distress oxide here and there. Also-I used some washi tape with gears to hide the hot glue on the tiny lights wires. 


The laugh was a token I bought at a thrift store with my husband. There was a small handful of them. I finally used one! :)  Yay! And an awesome paper doll.


Thank you for stopping by today!


Thursday, July 1, 2021

The Rainbow Challenge-July Edition

Hello Everybody!

Happy July! This month at the Rainbow Challenge we are all about Charmingly Cherry! 


This board has some fantastic ideas!  I chose to use some washi tape. Some how I have a lot of red-I think I bought a tube from Michaels a while back. The paper for the background and sentiment are real red from stampin up. And the sentiment is a die cut from Simon Says Stamp.  Then I added some gems for fun. :)


Be sure to check out my teammates take on this beautiful red color.  There is so much inspiration! I hope you will join us :)