Monday, June 30, 2014

Chimes Time

Hello Everybody!

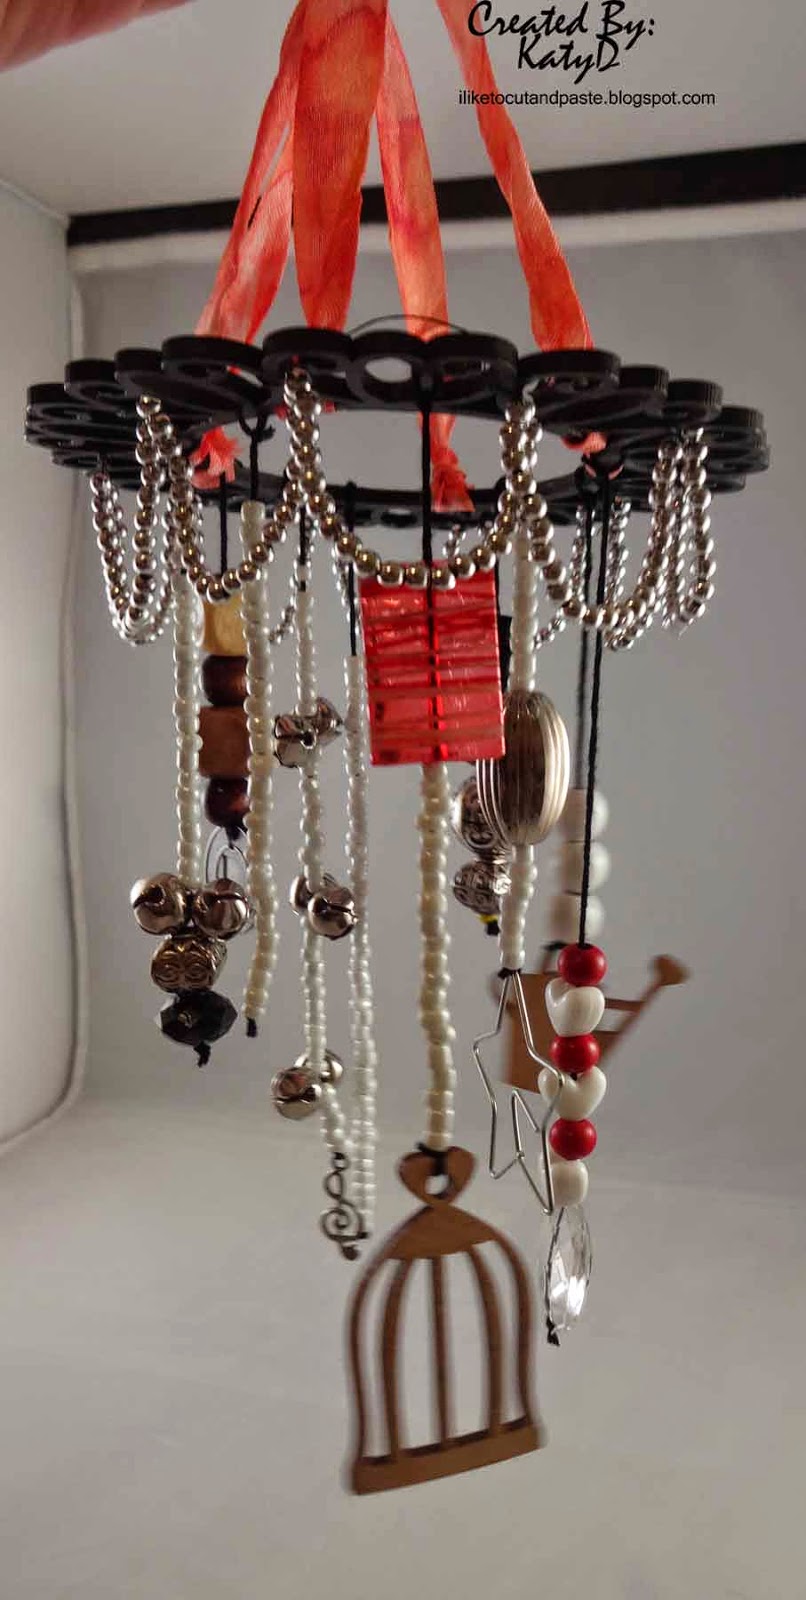
It my turn to show everyone my project over at the Unique Laser Designs Blog.  I made chimes using the Deco Frame Rhonda as the base.


Here are the different strands of the chimes.  I used a water can and bird cage as part of the decorations.


Here are the chimes "hanging."  I used beads and bells, and charms-Oh My! ;)


I used dye seam binding to hang the chimes.  If you go to the Unique Laser Designs Blog you will a more detailed description and walk through of how I assembled the chimes.


Thank you so much for stopping by!  Until next time my friends...have a beautiful day! :)


Friday, June 27, 2014

Favorite Things Friday

Hello Everybody!

At Scrap It Girl this week we want to know what your favorite die is!

If you are like me-this changes.  LOL!  One month I love one thing....until I love something else!

So right now I totally love this Courtyard Die cut from Tim Holtz.  I love the little inside pieces.  It can be a background layer or a border.  You can use both pieces or just the little diamonds.  Just so versatile!


Here is the Courtyard die in action.  I posted this recently but you can see the main part of this die with all of the paper strips and then the diamonds on the outer parts of the pages.  Awesomeness!  :)


I hope you link up with us!  If you have a die cut on your electronic machine that you use--link that up.  We'd love to see it! :)

Until next time my friends...it's time to go make some more diamond shapes! :)

Tuesday, June 24, 2014

Pirate Bookends

Hello Everybody!

I am sharing a cool project I did using Unique Laser Designs Blog.  I found plain wooden bookends at a yard sale.


They work!  But they need some love!


I painted them with gesso first.


I picked out what pieces I wanted to use.  I wanted to create a scene.  In the end I did not use the clouds.


Here is the other side.  I did not gesso these but I did paint them with craft acrylic paint.


I painted the sky and ocean.  For the ocean I used a metallic blue.  Then with a craft sponge and white paint, I blotted clouds in the sky.


This is my favorite part!  I free handedly cut an island out of a piece of craft paper and lined it up to make sure the palm tree would stand right on it.  I took light modeling paste and mixed it with So Saffron Re-inker from Stampin' Up.  Just a couple of drops and the sand was the perfect color!  Then I put it over my stencil.  I also made a small palm tree on the left bookend.

I placed the palm tree and chest.  For the palm tree I also used gloss gel medium on the part of the tree that touches the vertical part of the bookend.  I also used the medium for the pirate ship.  


Here is the finished project.  You can find out more about this project here.  


Thanks for stopping by!  Until next time my friends...it's time for an adventure!  :)


Friday, June 20, 2014

Favorite Things Friday--Non-Electronic Die Cutters

Hello Everybody!

It's time to find out our favorites over at Scrap It Girl!  We want to know what your favorite non-electronic die cutter machine is.  There aren't many to choose from-but that's ok!  I am on Team Cuttlebug!  LOL!


I love that I can use other manufacturers die cuts.  I also love love love my mover and shakers by Mr. Holtz.  They are just awesome!

Thanks for stopping by!  Stop by Scrap It Girl to tell us what your favorite non-electronic die cutter is!  Until next time my friends...time to emboss! :)


Layered Stencil Tag

Hello Everybody!

I made a tag for the challenge Compendium of Curiosities 3: Challenge 4.

The lady is a stamp from Graphic 45 and the sentiment is from Dylusions.  I also used a cool background stamp which is I took of picture.  Lastly, I used Tim Holtz products on the rest (ink, stain, stencil) and then modeling paste.  Oh and the "tie" is cheesecloth that I put a little shabby shutters ink on.


This is a stamp from Great Impressions.  I had taken my tag and covered it with antique linen stain.  Then I stamped this and the bottom going up and then rolled it on the top of the tag.  I am totally loving the look.  


Here is a close up of my tag.  If I had cool gears in my hair-I wouldn't change them out either.  ;)  hehe!


Thanks for stopping by!  Until next time my friends...Change for no one! :)  And don't try to change anybody either.  That usually doesn't have a happy ending. 


Thursday, June 19, 2014

3 Scrappy Layouts

Hello Everybody!

I have been busy making scrapbook pages--Yay!  There is a great challenge group at Let's Scrap.  Each month for 3 months a Use Your Stash Challenge is set up.  You have 3 months to get all 3 done but you find out each month as it goes.  I can already see you wheels turning.  This must be the last month to get all 3 challenges completed since here I am with 3 layouts to share.  You are right my friends!  

So here are each of the layouts and I will share with you what each challenge is.  

For Challenge #39 I used sketch 3-15-14.
Here's what we needed for this challenge:
--at least 3 patterned papers---You can see 2 main papers, the 3rd is stripes along the bottom of the pictures
--Use pop dots----The 2 big flowers are pop dotted (in the photo corners)
--Some stitch work (faux is ok)---Stitch work along the green stripe washi tape and bottom right corner
--Some Misting--The half panel on the left is sprayed with Stampin' Up Orange re-inker and water.  (The flowers are the same pattern paper but have not been sprayed.)
--A bit of twine---Between the stripe pattern paper and washi tape
--2 Buttons--I used 4 on the flower centers


Now let me tell you real quick about the cool papers and stickers on the layout.  A friend of mine has decided to do more quilting than scrapping and card making.  I am always sad when someone doesn't want to do this crazy craft anymore--However!  She has chosen me to be the recipient of her awesome collection of scrappy things.  I am just beside myself!  She has given me ink pads, eyelets, tons of stuff, including paper!  And in this paper assortments are some scrapbook kits from Stampin' Up which is where most of the things in this layout come from.  Love it! :)  Thank you Friend!!

Here is a little shaker from I kan dee made by Pebbles.  (Yay! Using up some ooollldddd stash!)  ;)  This corner is a real straight stitch from me.  :)


Look what I can do--put text boxes on a pictures LOL.  This picture speaks for itself. But there is one thing.  The mist is Stampin' Up's Orange re-inker with water.  It makes a great mist.  You can see the flower has the same pattern paper but not the mist.


The next challenge in this 3-month Challenge is #40.  I used sketch 4-23-14.
Challenge Requirements:
--2 types of washi tape--Both are Tim Holt'z the pointy fingers on the left, and yellowish color with print vertical on the right
--6 eyelets/brads--3 are on the banner, 2 at the title, 2 are on the lock 
--A bit of twine--I braided 3 pieces of twine for the banner and added twine bows
--2 Flowers--I used 3 from a Mon Ami Gabby Ribbon
--Use ink--The most visible ink is on the grey paper behind the photo and one of the flags of the banner.  The cardstock is embossed, and I inked it to show the emboss better.

Most of the papers, and stickers are from Echo Park-Time and Seasons 2.


Here is a close up of my little cluster.  The fingers pointing are washi tape from Tim Holtz, and that's his stamp too.  Sequins and square gems, and the smile at the bottom (which is an eyelet) are from Making Memories.  Scroll on down and I will show you the flowers.


This is a ribbon from Mon Ami Gabby.  I bought this ribbon a year or two ago.  I took a class at the Scrapbook Expo (from Clear Scraps) and they cut out the flowers for the project.  Brilliant!  I also had no idea how well it matched this Echo Park Paper.  Score!  I used fabri-tac to glue them down.


Here is my banner up close.  I used Martha Stewart twine and took three pieces of normal twine and braided them.  I wanted it to look thicker.  I cut those little flags out with a Sizzix stamp and framelet set.  Love! :)


And here is my last layout-a two pager!  

For Challenge #41 just paper.  What?  Yup.  Just paper.  I used sketch 6-12-13. 

All of these papers are from Fancy Pants.  The 2 backgrounds are from the Beach Babe collection and the rest of the pattern paper is from Beach Bum.  The cardstock I used is not Fancy Pants.  :)

So I used my Cricut for the Title Beach and the sunshine (paired with a glitter gel pen).  These cuts came from my Life is a Beach cartridge.  I also used Tim Holt's courtyard die.  I used the inside stars along both sides of the layout.  I pop dotted some of them.  For some of the paper behind the photos I used border punches and decorative scissors to change up the flat cuts.  At the bottom of the pictures is a paper ribbon from K&Company from their Wild Saffron collection.


The sand dollar is also Cricut but it was free this week in the Craft Room (Yee Haw!).  I used a little walnut stain and spun sugar distress ink to give it some life.


Here is the journaling.  The sand really was glittery!


Whew!  If you stayed until the end--Thank you friends!  Until next time my friends...have a great night! :)


Friday, June 13, 2014

Flower Card

Hello Everybody!

Over at House of Cards they are doing a photo inspired challenge, blog hop, and a DT call.  They have fantastic prizes and a great photo to design by.  It is at the end of this post.

Here is my card.  This is how I was inspired by the photo:

  • Flowers in the basket-flowers on the card
  • Numbers on the jars-I used translucent embossing paste (wendi vecchi) with the Cargo stencil (tim holtz) on the green layer of the background.  I used a grey and white stamp pad over the green paper to lighten it.
  • The green stems for the green layer of the background
  • If you look in the basket there is a yellow flower toward the right-the yellow ribbon was inspired by this.
The photo is great!  I used a piece of clear scraps for the sentiment.  And the sentiment is from an older set of Stampin Up stamps that I bought at a thrift store (scrore!).  The flower stamps are from Sparkle N Sprinkle with brads in the center.


To make the first layer of the background I applied this distress ink.  But it wasn't enough.  So I inked up this stamp from Tim Holtz (stampers anonymous) and rolled it onto the card base in different directions.  It's subtle but it gave this area little extra something.  :)


Here's the picture if you haven't already seen it.  There is still time to play, hop, and apply! :)


Until next time my friends...have a good evening! :)


Favorite Things Friday-Electric Die Cutting Machine

Hello Everybody!

It's Friday and it's time for our Favorite Things!  This week we are celebrating Electric Die Cutting Machines.  For Christmas my husband gave me a Cricut Expression 2.  It replaced the first one that Cricut came out with.  It was a wonderful surprise and I love it!


I love the craft room too!  What is your favorite machine?  Link up it here and let us know! 

Thanks for stopping by!  Until next time my friends...have a wonderful day! :)

Father's Day Canvas

Hello Everybody!

Today it's my turn to share a project at the Blog for Unique Laser Designs.   I created a burlap canvas using Unique Laser Designs wood embellishments.


Here was my thought process.  I had put gesso in the background but I wasn't sure what colors I would use.  I used Tim Holtz paints in the background.  This is my first burlap frame and for me stamps didn't work so well on it.  So I used paints and light modeling paste and gelatos with the harlequin stencil.  

I did put some Wendy Vecchi translucent embossing paste on here using a burlap stencil from Tim Holtz but it didn't come out very well.  Which is ok!  It does blend in with the artsy organic feel to the canvas.  The places that I put the clear embossing paste just look like shiny spots, not shiny little squares.  LOL.  Next time I will go for a bigger stencil.  :)


Here are some bricks from the brick stencil that Unique Laser Designs has.  You get the stencil AND the bricks.  Super cool!  Some bricks are blank but some have words on them.  


I painted the polaroid frames.  I just used picket fence by TH on those.  Since I wasn't looking for a stark white look, I didn't use gesso first on those.  I used salty ocean and peeled paint for the music notes.  On the heart is barn door red and I used glossy accents on it.  The word smile I left in its natural wood state.  The flower is from Maya Road.  

Here's another picture of my canvas.  I love having the then and now photo.


I am submitting this to the Simon Says Stamp Monday Challenge:  Paint  I used Tim Holtz paints on the background and on the heart, musical notes, and frames.

Unique Laser Designs is also have a Design Team Call!  Come check out the details here

Thank you for stopping by!  Until next time my friends...Happy Father's Day! :)

Saturday, June 7, 2014

Shark Time

Hello Everybody!

I made this little card for a one of my son's friends who is having a birthday.  He loves sharks and that is the theme of his birthday.  So I was looking through my Life is a Beach Cricut Cartridge  and cut this shark card out.

It's 3.5 by 3.5.  For the water I took a piece of clear scraps (which comes in sheets but is thicker than a transparency but you can cut it and emboss it etc) and added alcohol inks to it.  I do think that Ranger's alcohol inks are magical.  Each time is a different result.  I took two blues and the silver and inked the applicator and then there is water.  :)

I used a Faber-Castell white PITT artist pen to outline the shark.  Maya Arts twine outlines the card.

I added a googly eye and a birthday hat and now he is ready to party!


I went on YouTube to see how to make an envelope for it.  I have the Martha Stewart score thing with the envelope and was able to get the measurements and see how to do it.  (Which is easy by the way) :)

I am entering this cute lil' shark into the following challenges:

Simon Says Stamp Monday Challenge: Magic-Alcohol Inks are magical.  (and so is my cricut really!) :)


Thank you for stopping by!  Until next time my friends...I'm ready for some cake and ice cream! :)


Thursday, June 5, 2014

Father's Day Card

Hello Everybody!

I finished a Father's Day Card using my Tim Holtz pocket watch die, grungeboard, and foil cardstock.  It is using the techniques he used in his January Tag, except I used alcohol inks instead of paint in the middle.

The paper is a scrap that got distressed with black loot distress ink.  I gold embossed the sentiment.  And I used chit chat words for the middle.


I am entering this in the following challenges:


Thank you so much for stopping by!  Until next time my friends...have a good night! :)

Wednesday, June 4, 2014

Cute Lil' Dinosaurs

Hello Everybody!

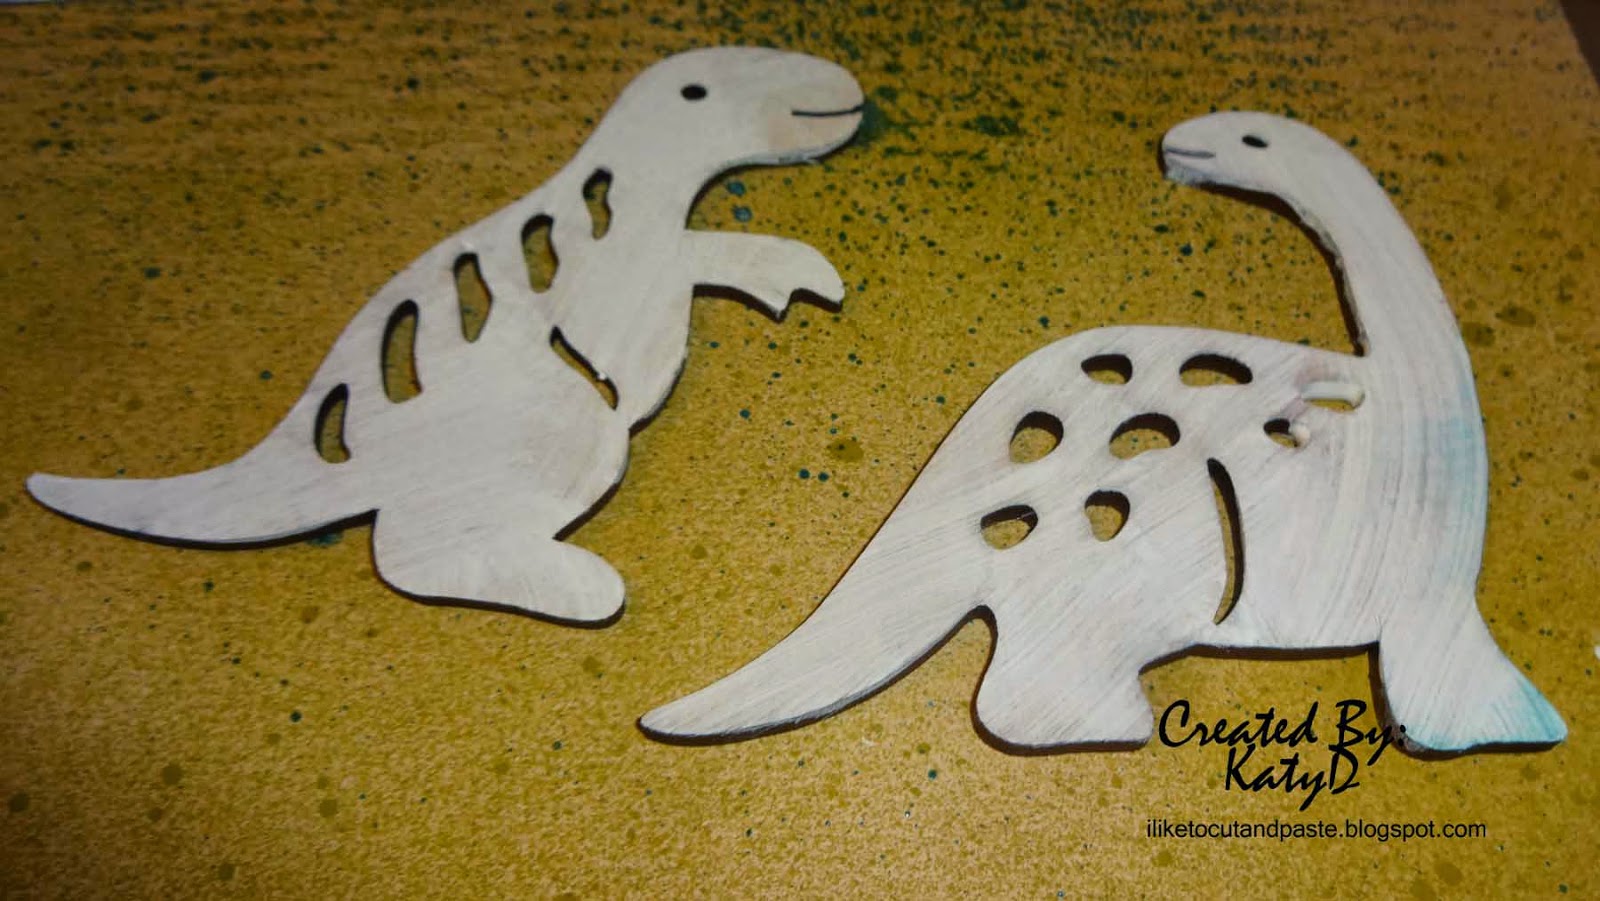
It's my turn over at Unique Laser Designs Blog and I made this scrapbook page featuring their cute dinosaurs!


 For the dinosaurs I covered them in gesso.  But give them a second coat-otherwise you will see the streaks through the ink.


I used distress inks shabby shutters and salty ocean.  Then I applied versamark and clear embossing powder to the dinos.


I didn't get a good picture of the shiny embossing but you did get to see his new googly eye!


And this dino got a mustache and googly eye!  You can use your crop-a-dile to make a hole in the wood pieces.  


Here is a close up of the top corner of my page.  I used mists and pastes on it.  Tim Holtz's star stencil-2nd time in a few days.  The tags I used different colors of distress ink and then I ran them through my crimper.  I saw someone else have tags like that-brilliant!  And yay I get to use my paper crimper!  The brads and ribbon are from My Mind's Eye-Abby Road.  (That's stash that has been around awhile!)


I used this week's sketch at Let's Get Sketchy for my layout.  So I am linking up with them.  :)


Thanks for stopping by!  Ya'll are all Dino-Mite!  :)  Oh PS-if you are looking for a super duper cute Father's Day card stop by the Unique Laser Design Blog.  Yesterday my teammate Michelle posted a couple of really cute projects for Dads.  :) 


Sunday, June 1, 2014

Things With Wings

Hello Everybody!

Whew!  June 1st already!  Time for summer!  :)  Over at Scrap It Girl we are celebrating things with wings.  

I made this card.  For the background I put mustard seed distress ink and then I used cleared embossing powder on the stamp along the side (Tim Holtz).  This is one of my favorite stamps fyi!  Because I used clear embossing powder you can see the variation in the ink-which is what I wanted.  Then I stamped the flowers (tim holtz) with dusty concord distress ink and put clear embossing powder on it.  So fun!

I used a musical stamp from Sparkle N Sprinkle in the background and the dots are from Rubber Stamp Tapestry.  Then with silver colorbox ink, I used a Tim Holtz stars stencil to add to the background.

I used Tim Holtz seedless perserves paint and glitter on the bird.  And then the sentiment is from Dylusions.  A new stamp set that I am finally using-yay!  :)  I added Tim Holtz stars too.  I don't know what it is about those little stars but they are awesome.  


I am linking this card to the challenge at Simon Says Stamp Monday Challenge: The Artsy Stamp.

Please come join us!  We can't wait to see what you create! :)

Until next time my friends...it's time to fly away!