Saturday, February 1, 2014

Hearts for My Valentine

Hello Everybody!

The February Challenge at Scrap It Girl is Hearts.  So I made a Valentine's Day card-inspired by Tim Holtz.

On his January tag Tim used Distress paint on an embossed foil covered piece of grunge board.  (Did you get all that?) ;)  So that is how I made my heart.

I put a piece of foil tape over a piece of grunge paper (it's thinner than the board).  I used the heart part from the Love Struck die.  Then I embossed it with my candy hearts die from Cuttlebug.

I used picked raspberry and picket fence distress paints and worked it into the heart.  Then I used a paper towel to remove the extra paint.
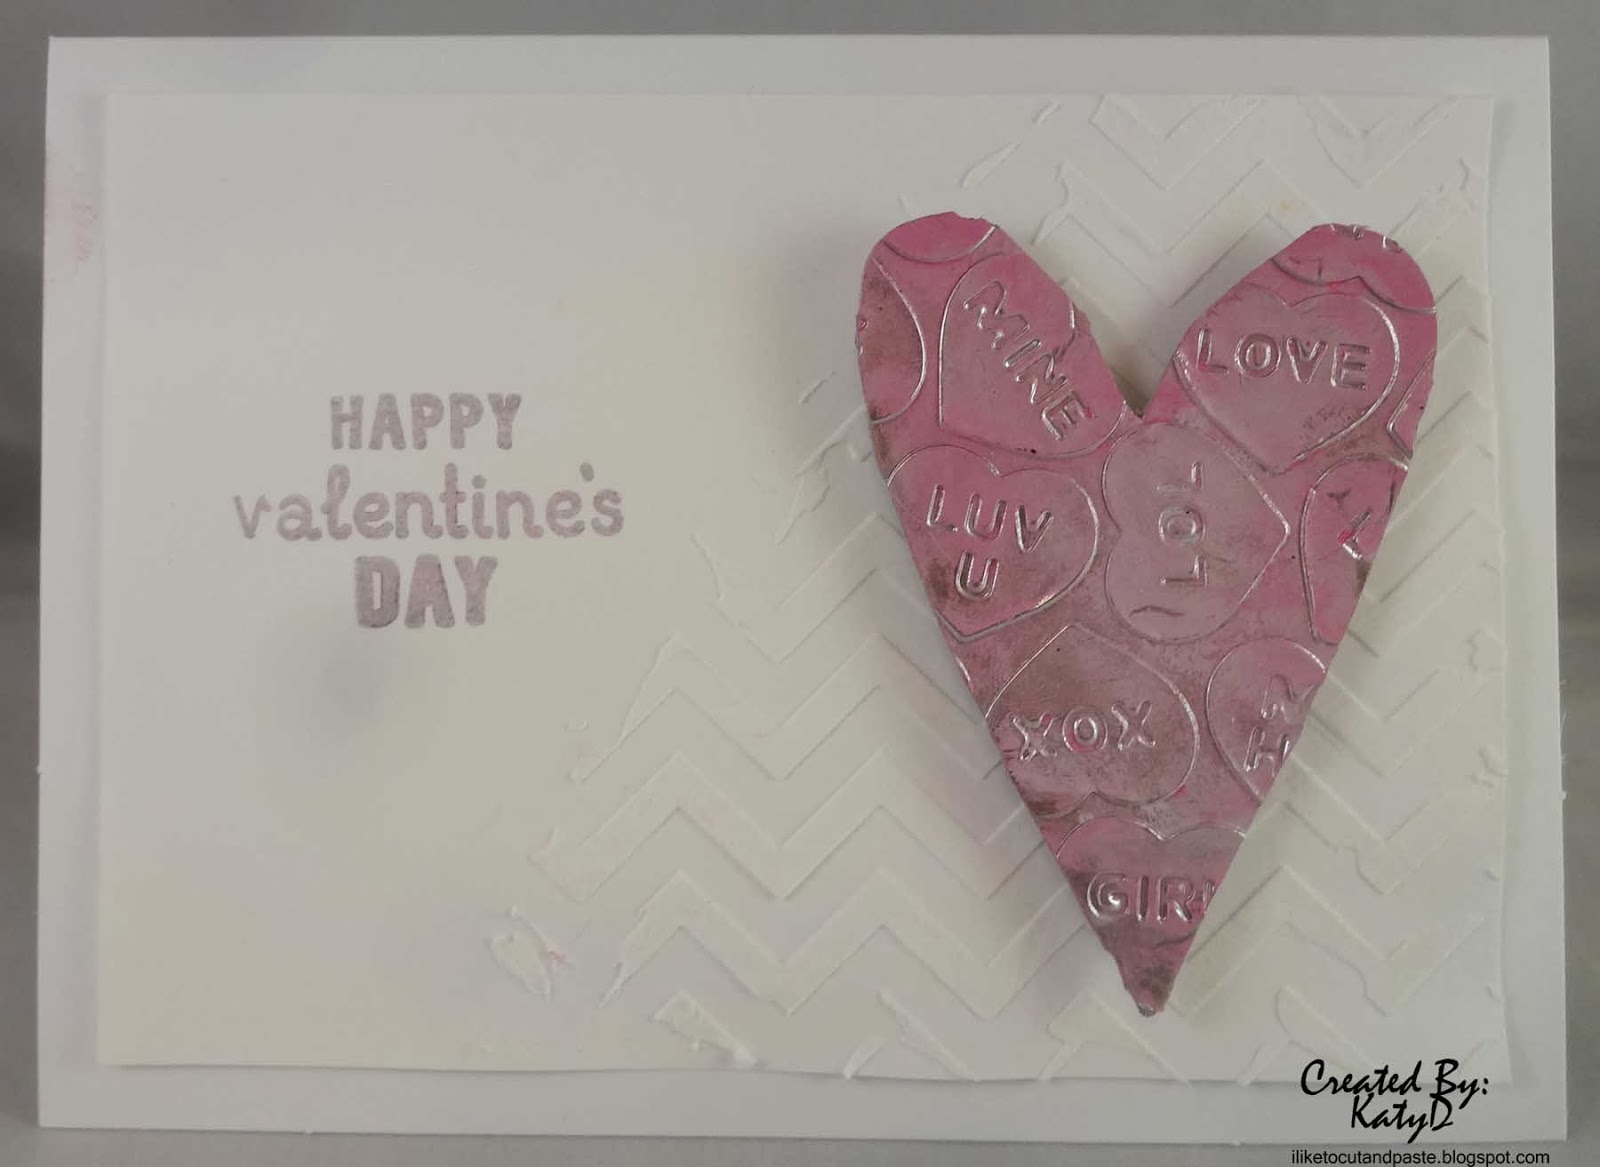


I used a Heidi Swapp stencil and light modeling paste for the chevrons behind the heart.  Then I stamped the sentiment with silver ink.  The stamp is an old KI stamp.  I pop dotted the heart.

Here's a close up:


Go over to Scrap It Girl and see the prize she is offering.  The prizes are awesome (I have won a couple and can personally tell you!)  Here is a picture:


Yeah-all of that!  And the designers vote on the entries-it isn't a random draw.  You get to entries.  So get your heart projects together and come and play!  You won't know unless you try! :)

Thanks for stopping by!  Until next time my friends....what will you make with your hearts?

Friday, January 31, 2014

My Favorite Craft Storage Idea

Hello Everybody!

I am so excited as this is my first post as a DT member for Scrap It Girl.  I know-I can't stop smiling!

So Kimberly is starting a new thing (you may have seen my previous posts) called My Favorite Things.  Each post is about a different favorite thing.  Like last week it was about a favorite tool.  All you have to do is blog about your favorite thing and link it up.  New ones are posted every other week.

This week it is about a favorite craft storage idea.  Now let me tell you-I don't like to buy organization or storage.  To me that is less money to spend on goodies! LOL.  However, my cling stamp collection is growing at a rate that I am not able to keep up with.  So I looked at stuff online.  I even watch a few videos on how designers stored their stamps.  Then one day at Wal-mart I saw these pencil pouches.  I bought a few and a binder.  And so far I love it!


As you see I have my stamps in there.  For some of the pouches I left the paper in and put stamps in the front and in the "back" of the pouch.  On the left side those are in the back of the pouch.  Now some of those are Stampers Anonymous and they come on the nice clear pages but I have a hard time get my stamps to stick back to those.  So now every time I go to Wal-mart I go to the office supply section to see if they have anymore.  (They were currently out the last time I went.)  They are less than $1 a piece (unless the prices go up of course).

And this particular binder I bought at a garage sale for .25.  This has totally made my stamp life better :)  I just flip through the pages.  Now if I could organize them by events.... ;)

Thanks for stopping by!  Until next time my friends...what's your favorite organizational thing?


Wednesday, January 29, 2014

January Tag

Hello Everybody!

I just finished my Tim Holtz January Tag.  Yay!  It was really fun to do.  I finally bought Pumice stain and distress ink-and let me tell you-I am so glad I did.  It really is a great grungy color to have.  I would say a must have color.

I used twine for the tie part of this tag.  I used a little black soot distress ink to make it darker.  I am also submitting this tag to Simon Says Wednesday Challenge:  Anything Goes with Twine or String.

So here is my tag:


I used a stamp from 7 Gypsies for the numbers down the side.  I didn't have the rub-on that Tim uses.  I did try to blot it with a paper towel to give it a distressed look but it didn't get as distressed as I would have liked it.  I should have practiced first.  

I did flick the paint-that is so fun!  Also, it is like a mist.  Next time I will use my mist box-LOL.  There are a few things now that have black soot dots on them but it's ok.  :)


Here is a close up of the pocket watch.  My sister bought me the circles for Christmas and I am soooo glad she did!  It made doing this a whole lot easier!  I need more little gears though-my supply is running out.  And I love the way Tim makes these words from labels to like banners with the triangle cut on the end.  Why couldn't I think of that? ;)

My sentiment on the tag is different than his.  I couldn't find my enjoy the journey stamp but in searching for it I did run across this one.  It came in a birthday stamp set-but how perfect for January!

Thank you for stopping by!!  Until next time my friends...stay warm it's cold out there. :)

Monday, January 20, 2014

Bed Shopping Layout

Hello Everybody!

Tonight I made this layout using the sketch at Let's Get Sketchy: January Week 2.  When I first saw this layout I thought it looked hard.  And then as I gathered my pictures for it and started looking at the DT's wonderful examples I realized this was a great sketch especially for scraps.

So I got out my folder of Chloe's Closet from Making Memories.  It's old but I still have enough pieces to keep it all together in a folder.  ;)  Many moons ago I took a Making Memories album class and we got all of these coordinating goodies.  It's always fun when there is stuff left over!


Here is a close up of the middle.  We love some IKEA! :)


Here is the journaling.


Here is the right hand corner.


Here is the left hand corner.  There is a paper with newspaper print circles.  So I cut them out (there are 2 different sizes) and then roughed up the edges and colored them with Salty Ocean Distress Ink.  I used a brad in the middle for this flower.  I made two of these because of the circles.


I used a photo overlay frame for the 2nd picture.  

Here is the sketch:


Thanks for stopping by!  Until next time my friends--do you have a favorite furniture store?


Sunday, January 19, 2014

Favorite Tool

Hello Everybody,

Kimberly at Scrap It Girl has a cool thing going on where every Friday in January you share your Favorite of Something.  Last week it was your favorite project.  This week it is your Favorite Tool.

Now if you are like me-this is quite a challenge.  I love everything!  From my cricut to my cuttlebug to my laptop (for blogging all of these fun scrappy things and digi stamps!).  But the one this I picked was a more simple tool.

This is my Distress Ink Applicator by Ranger.  I learned how to use this little thing and I haven't stopped.  I ink up cards, scrapbook pages, you name it.  I have gotten where if something is too bright-I take it down a notch with walnut ink or vintage photo distress ink.  But I can't use the ink unless I have this applicator here.  It also applies alcohol ink and paints.  This is my go to tool.  :)


What's your favorite tool?  Link it up!

Until next time my friends...have a creative day! :)

Smile Layout

Hello Everybody!

I created this layout using the sketch at Sketchabilities: Sketch 107.  I used spray inks (Mr. Huey and October Afternoon) and some modeling paste with a Tim Holtz stencil.  I also used one of my new stamps from the Bitty Grunge stamp (my sister gave me for Christmas).  There's washi tape and some Ideology on there as well.

My son who is older now than in this picture insisted on putting this bingo piece on there.  There isn't a significant reason for the number.  He just picked it and wanted to glue it down.  So I said ok-but I told him where to glue it down.  LOL ;)  The blue star is Tim Holtz and I used alcohol ink to paint it blue.


Thank you for stopping by!  Until next time my friends...Smile!


Friday, January 17, 2014

Vintage Anniversary Card

Hello Everybody!

I am so glad I finished this card and it turned out like how it was in my head! :)  I love it when a plan comes together! ;)

I recently bought some stamps and this couple was one of the stamps.  They are all previously used but totally brand new to me and I am so excited to start using them.

So all of a sudden I starting visualizing this card with the sketch from House of Cards and the stamp.  I used my Cricut and the Craft Room (love the craft room!) to get a scalloped circle cut out.  It's tricky when you are going for the negative.  But third time was a charm :)

I used Vintage Photo Distress Ink on my embossing folder and then embossed the tan cardstock that the oval had been cut out of.  I did practice this first before I did it.

I love how it turned out.  Then I adhered the ribbon and the pearls.  The purple flower was apart of a bigger flower so I detached it.  That is not usually in my nature.  If something comes together I use it like you are supposed to.  But the flower that this was attached to was so awesome and 3-D-ish I thought it would take away from my couple.  So I took this flower off and I am so glad I did!  I put an adhesive pearl in the middle of it.  Then I pop dotted this whole panel.  It creates a sort of window or frame for the couple.

I wanted to use this as a Valentine's Day card but my hubby said maybe an Anniversary card.  He's so smart-that's the perfect idea for this card!


Here are the challenges that I am submitting this to:

House of Cards: Cute and Vintage style using this sketch.  (I chose vintage.)

Simon Says Stamp--Anything Goes--Monday Challenge

Simon Says Stamp Wednesday Challenge-Emboss It!  The front panel is embossed with a Sizzix folder.


Thank you for stopping by!  Until next time my friends...good night! :)